Disclaimer
Please note that you are responsible for checking whether you fulfill the conditions to use the version you intend to use or not.
The free and premium versions are not built to be deployed in a business setting and introducing it
into such is against the EULA;
see
http://www.malwarebytes.org/eula/mbam
for EULA and
http://www.malwarebytes.org/business/antimalware
for MalwareBytes Business solutions.
Repackaging
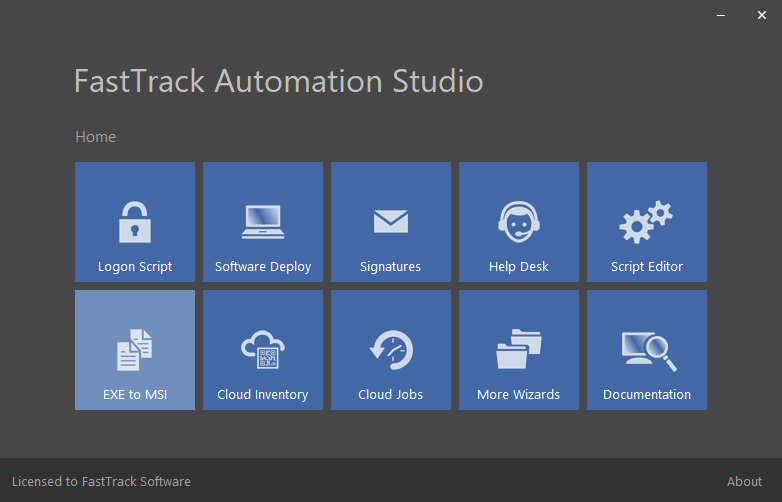
The first step is to start the EXE-to-MSI wizard (also known as Deployment Package Wizard). Simply start the "EXE to MSI" icon on the Home screen.
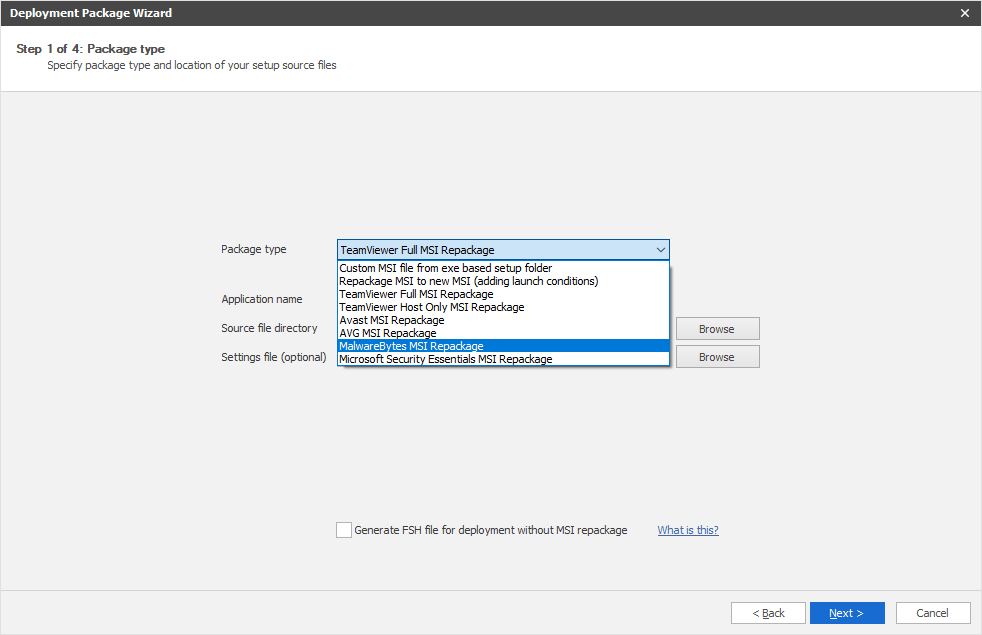
On the second page of the wizard, the type of output package must be selected. Here we must select MalwareBytes in the list.
There are templates for TeamViewer, Avast, AVG, MalwareBytes and Microsoft Security Essentials, but you can repack any type of installation using the top
two options; see instructions for this further down this page. The templates options are
basically just extended versions of the generic EXE-to-MSI, which is the first option in the list.
The current setup file must be downloaded from
www.malwarebytes.org.
Click the free version download link to get the current setup files. The setup files are the same for the Free and Premium versions;
your license key determines whether you have the Premium edition or not. The downloaded file is named for example "mbam-setup-2.0.2.1012.exe".
Place this exe file in the directory that you specify as the setup file directory.
The wizard will look for an exe file starting with "mbam" in this directory.
When selecting MalwareBytes in the list, you can enter licensing information, if you have the Premium edition.
The licensing information will be deployed with your MSI file.
Convert to MSI or not?
At this point you need to decide, how to deploy MalwareBytes. You have two options. One is to continue
the wizard and you end up with an MSI file. The other options is to use the checkmark at the bottom.
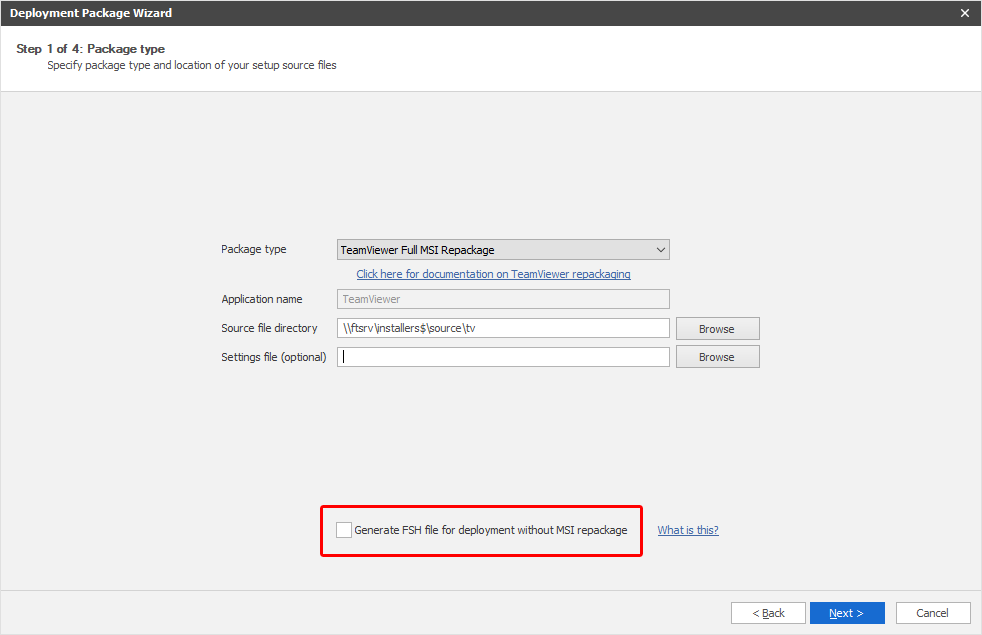
FastTrack Automation Studio can actually deploy software without a central management system. If you tick
the checkmark, the wizard will save the generated script files instead in the folder, where you have
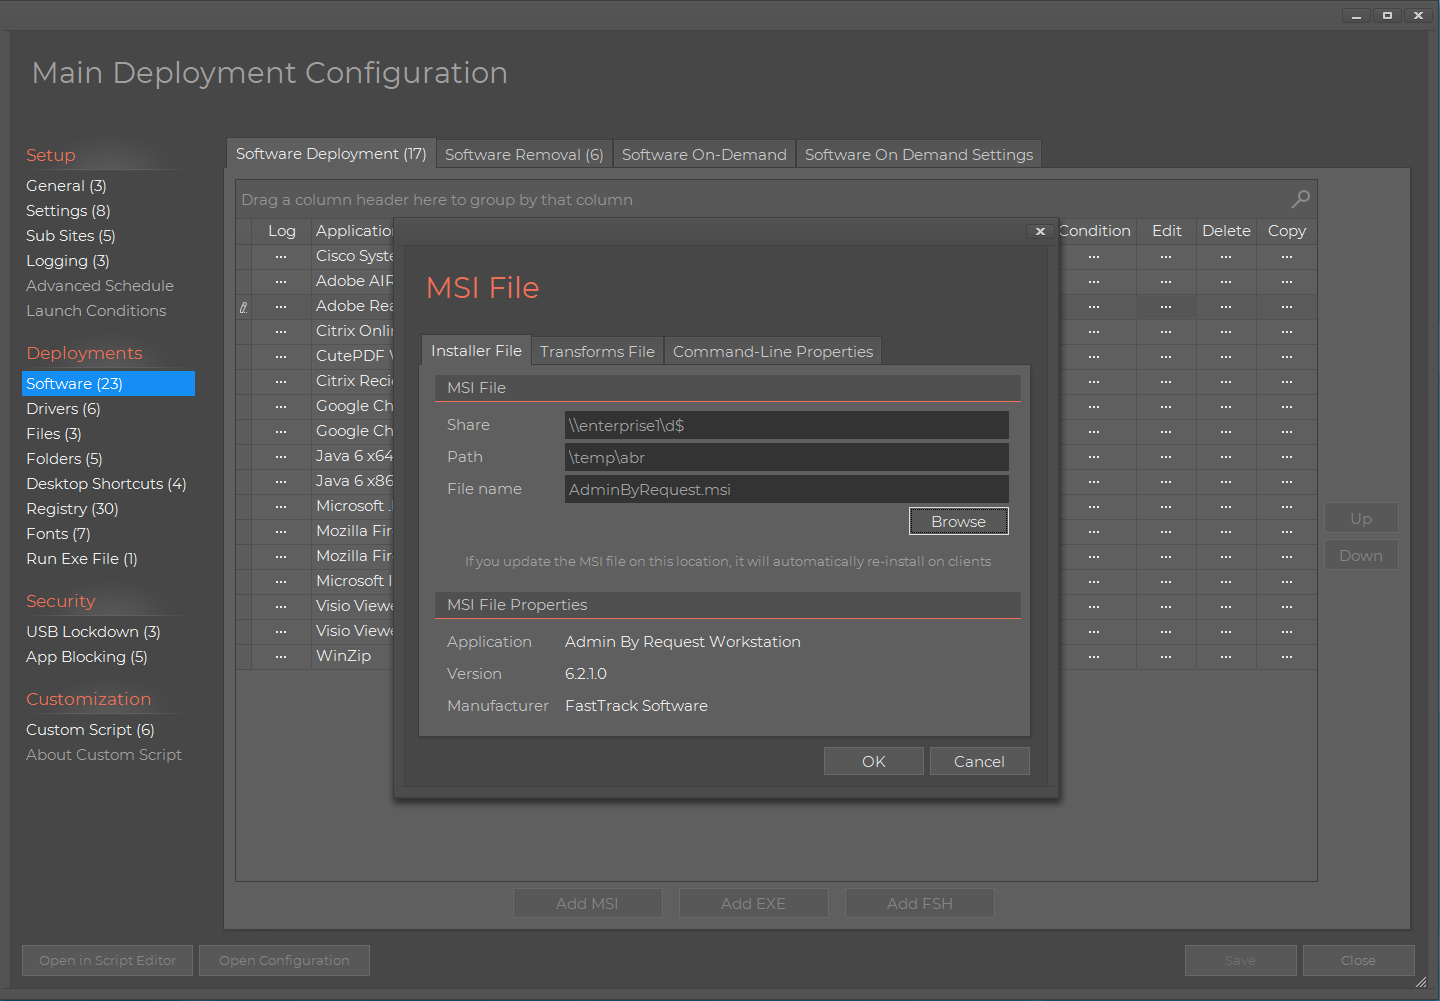
the MalwareBytes setup file. Then you can click the "Software Deploy" icon in the Home Screen and simply
point to the script file instead using the "Add FSH" button shown in the screenshot below.
Refer to
this page
for more information on automated software deployments.
MSI repackaging
Clicking next will show launch condition options. These options allows you to prevent installation of MalwareBytes on certain computers,
such as servers. This means that you can deploy the package to an entire OU or container in your Active Directory
with Group Policies and avoid having it install on for example servers and virtual machines.
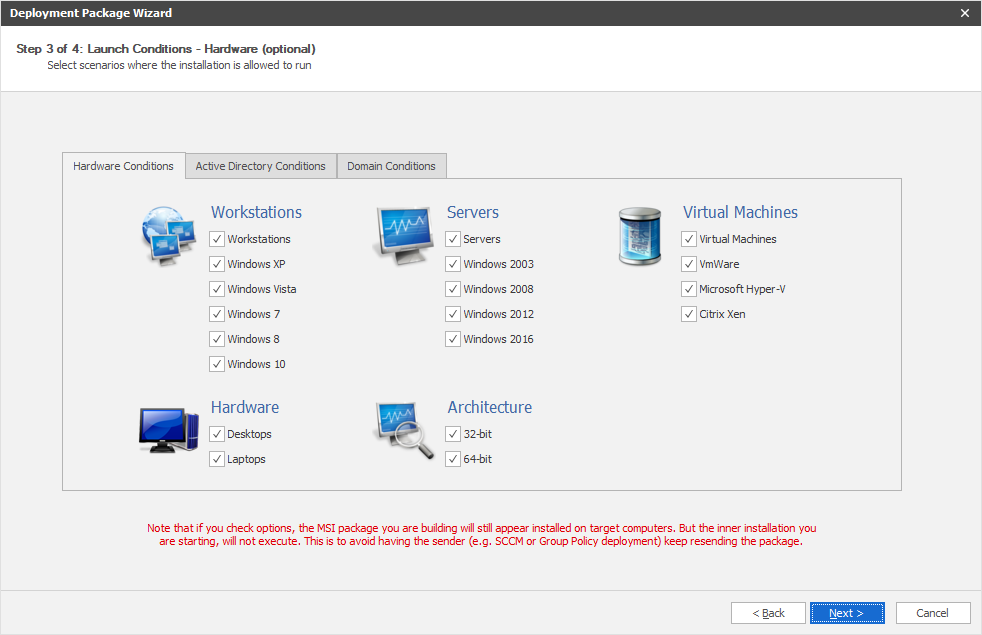
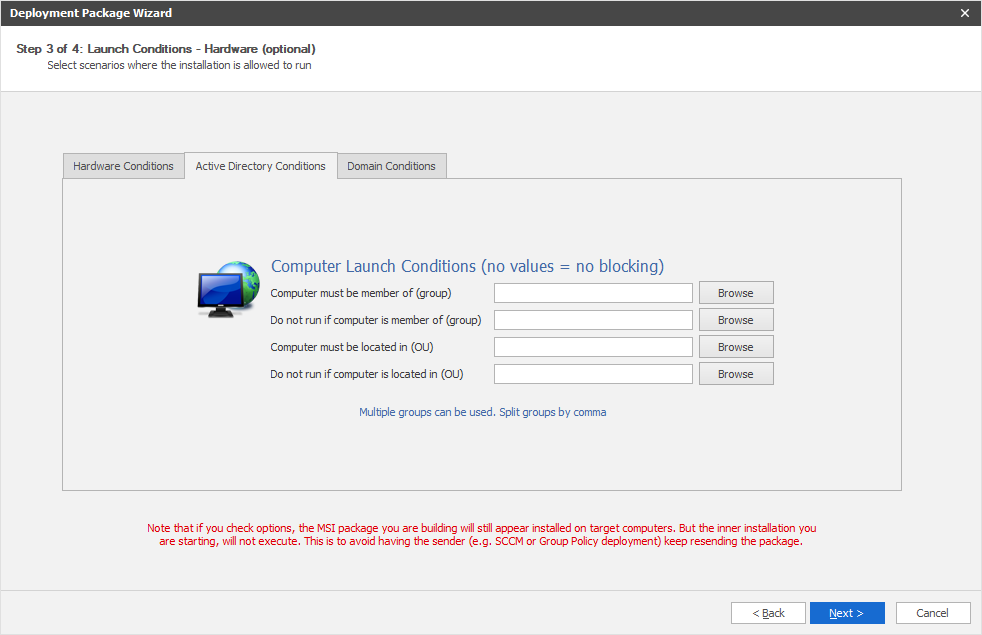
The first page lets you block on hardware and operating system. The second launch condition page lets you block based on
Active Directory information:
To understand how launch conditions can actually work with Group Policies, we have to look at what the wizard does.
There are generally four scenarios to create MSI files with FastTrack Automation Studio, as shown below.
What we are doing here is using the option to the left. The MSI that wraps around the MalwareBytes setup file is always
installed, but it does not do anything other than register as an program in the Windows programs list,
if it hits a launch conditions blocking. This means that from the point
view of Group Policies or SCCM, the installation is always successful and will therefore not
try to resend the MSI file. This is why there was also an option on the first page to use a setup MSI file inside the controller MSI,
because then you can let the controller MSI always install, but only install the setup MSI on certain conditions,
essentially allowing you to deploy all your software to all computers using Group Policies.

Clicking next in the wizard after launch conditions will ask you for name of the output MSI file. This is the controller MSI
file that contains the MalwareBytes installer. When successful, the complete page is shown. Notice how it displays a script that
you can open in the Script Editor and edit. Essentially the wizard does nothing more than compile this script and your
MalwareBytes setup file as an MSI file. If you are not happy with the installation script or your need to expand it with,
say licensing information, you can just open and edit the template script in the Script Editor and save
it to the same folder as the MalwareBytes setup file. You are now using the third box in the
drawing above, where you build your own custom MSI package. This is explained in a more detail at the bottom.
Note that if you used launch conditions, you will see that conditions were inserted at the top of the script, which
is why it is a good idea to let the wizard create a template script, in case you need to extend or modify the functionality.
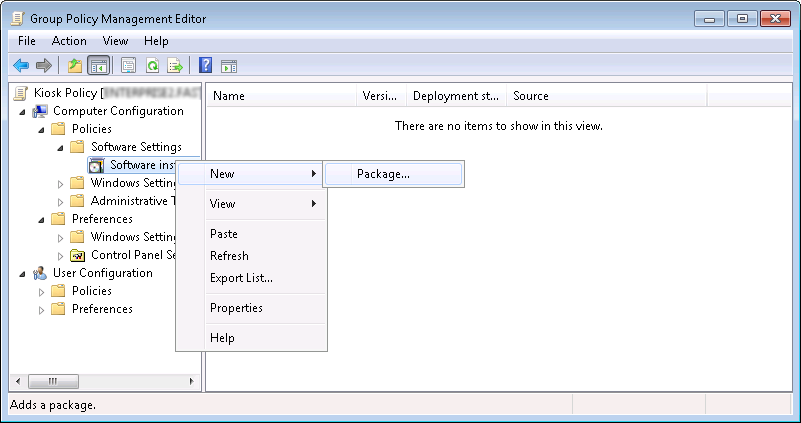
That's it! You now have an MSI file that will install MalwareBytes unattended,
which you can now assign as a software installation to Group Policy (see screenshots below).
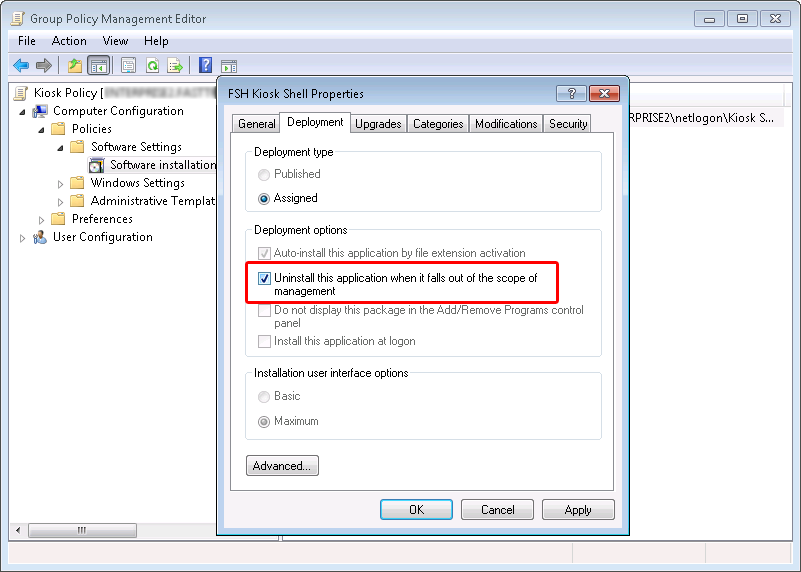
As a general principle for Group Policy MSI deployment, you should check the
uninstall option, to make sure that your MSI file will uninstall on all machines,
if you remove the GPO MSI package.
Note that if you are using a trial version of FastTrack Automation Studio, the package will only deploy to 5 computers,
as this is what the trial edition allows - the rest will behave similar to launch conditions,
where the setup exe is not executed.
Similar articles exist for
Avast,
TeamViewer,
AVG and
Microsoft Security Essentials (click the links to see documentation).
Expanding the script
If you need to modify or expand the script generated by the wizard, you must check the "Create a new script
using the above template" on the last page of the wizard and save it to the same folder as your MalwareBytes setup exe file.
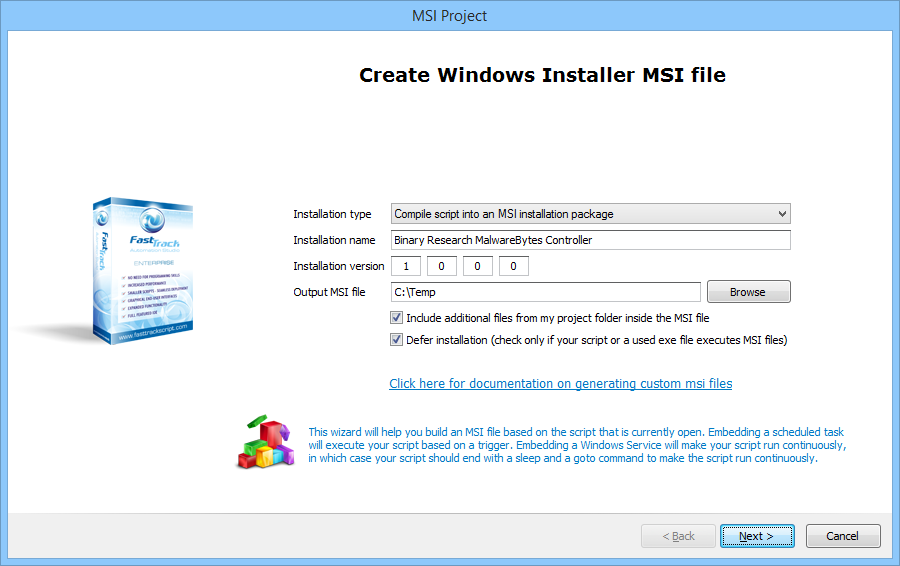
Once you have modified the script to your needs, you must use the "Compile to MSI" option in the top menu.

The MSI generation wizard will open, as shown below.
Make sure that you check both "Include additional files from my project folder inside the MSI file" and
"Defer installation". When you get to the page
to select additional files inside the MSI file, make sure to check your MalwareBytes setup exe file.
Uninstallers
If you checked the "Remove other Anvi-Virus products before install" checkmark in the wizard, the script will automatically uninstall
AVG, MalwareBytes, Sophos and Security Essentials before running a new installation. The was this works is that a script snippet is
included in the generated script. It uses the command "UninstallProgram" for these four products, which extracts the uninstall string
for the product and then additional unattended switches are appended to it. If you need to uninstall more products, you can use the
UninstallProgram command (in a custom compilation as explained in the previous section), but you will need to Google unattended uninstall
switches, if the program stops and ask for information during uninstall. The example below is for MalwareBytes, where three additional
switches ensures that there is no user interface and no questions. If the product is not installed, UninstallProgram does nothing. You
can specify the whole name from the Windows programs list, or a left part such as using just "AVG" to ensure that it catches both
AVG 2013 and AVG 2014.
UninstallProgram MalwareBytes,/VERYSILENT /SUPPRESSMSGBOXES /NORESTART
If you need to uninstall Avast or Norton, you need to download uninstall utils from their web sites and include these in your custom compilation,
as explained above. For most other Anti-Virus products, the method above using the UninstallProgram command is sufficient for a successful unattended uninstall.
Advanced example
The videos below are a very complex example provided by a customer to re-package and deploye a custom build exe file without leaving any footprinting
on clients. Press play on the left video to see how it was done.
You can download the scripts from the video
here.
|
|
|
Deploying MalwareBytes unattended using FastTrack Automation Studio
|
Creating the MalwareBytes deployment package
|