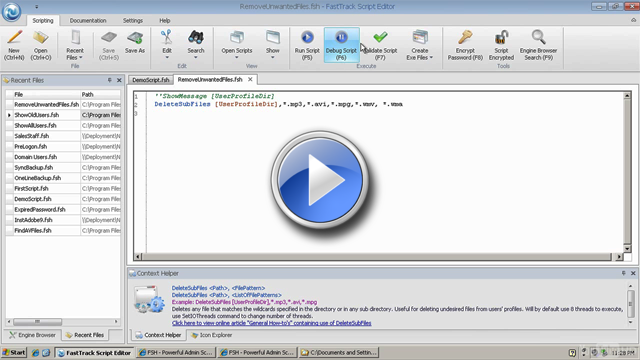
Q: How do we delete music and movies from network computers?
A: These files can be removed with the DeleteSubFiles command like this:
DeleteSubFiles
[UserProfileDir],*.mp3,*.avi,*.mpg,*.wmv
Simply insert a single line anywhere in the logon script for example and fill
in your own desired file patterns. All directories in the users' profile will
automatically be traversed in the example above.
Click the play button below to watch a demonstration of using the DeleteSubFiles command.
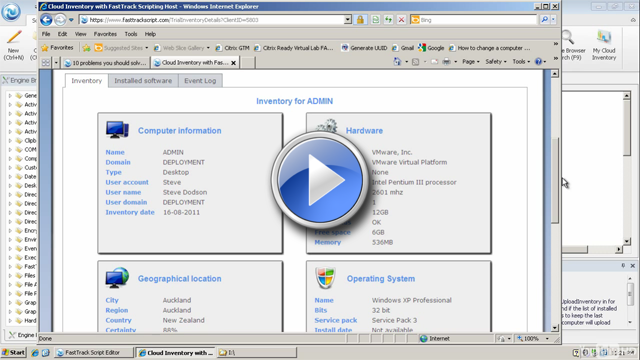
Q: I don't have a management system. Can I collect installed memory to detect which computers needs be upgraded?
A: Information like physical memory, free disk space, operating system, last logged on user and such are all part of the information
uploaded to SkyBox. Simply issue the UploadInventory command in your logon script, and you have all the information available in your inventory
web. Click the play button below to watch a demonstration of using the UploadInventory command.
Please refer to
this article for more information on SkyBox.
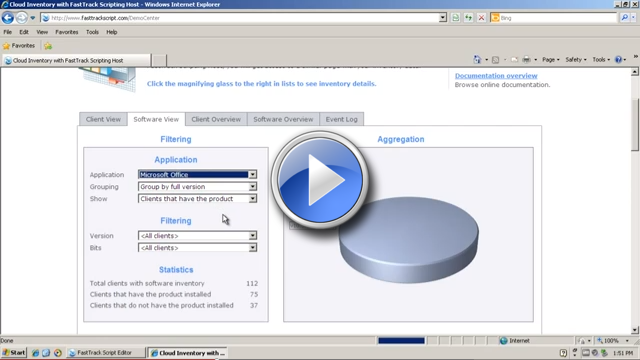
You can also watch a live demo of the inventory web with fictitious data
here.
If you have reservations using SkyBox or you would like to have the same information internally,
there are other options. The simplest one is to use the InventoryXML function, which will produce an XML
snippet that represents the same information that is uploaded to your SkyBox web. If we wanted to
store this on a share called "Admin$" on the server "AcmeServer", the script line would look like this:
WriteFile
\\AcmeServer\Admin$\Inventory\[ComputerName].xml,[InventoryXML]
This would produce an XML file for each computer on the network that is
automatically overwritten at each logon. The content could look like this:
<Inventory>
<Computer>
<ComputerName>ACMEPC0001</ComputerName>
<ComputerDomain>ACMEDOM</ComputerDomain>
</Computer>
<User>
<UserName>PDH</UserName>
<UserFullName>Paul David Hewson</UserFullName>
<UserDomain>ACMEDOM</UserDomain>
</User>
<OperatingSystem>
<OperatingSystem>Windows 7 Ultimate</OperatingSystem>
<OSBits>64</OSBits>
<OSMajor>6</OSMajor>
<OSMinor>1</OSMinor>
<ServicePack>Service Pack 1</ServicePack>
<InstallationDate>04-05-2010</InstallationDate>
</OperatingSystem>
<FastTrackScriptingHost>
<FSHMajor>7</FSHMajor>
<FSHMinor>0</FSHMinor>
<FSHRevision>0</FSHRevision>
</FastTrackScriptingHost>
<Manufacturer>
<Manufacturer>LENOVO</Manufacturer>
<Model>43145GG</Model>
<SerialNo>R82978X</SerialNo>
</Manufacturer>
<Network>
<LastIP>172.28.1.11</LastIP>
<MAC>00:21:A7:2A:21:E2</MAC>
<NICSpeed>1000</NICSpeed>
</Network>
<Hardware>
<CPUSpeed>2267</CPUSpeed>
<CPU>Intel Core i5 CPU M 430 @ 2.27GHz</CPU>
<NoProcessors>4</NoProcessors>
<ComputerType>Portable</ComputerType>
<FreeDiskSpace>27</FreeDiskSpace>
<DiskSize>99</DiskSize>
<DiskStatus>OK</DiskStatus>
<MemorySize>4080</MemorySize>
</Hardware>
<Monitor>
<Width>1366</Width>
<Height>768</Height>
<Depth>32</Depth>
<NoMonitors>1</NoMonitors>
</Monitor>
</Inventory>
To see InventoryXML in action, please click the video below, which will also demonstrate how
to upload events to your inventory.
Another option is to make a similar XML snippet that is created manually by using the WriteXML command.
In the example below, we assume there is a writable share called \\AcmeServ\Collect$ that everyone can write to.
Putting this single line in your logon script, will collect the memory installed in each client logging on:
WriteXMLValue \\AcmeServ\Collect$\ClientMemory.xml,Memory/[ComputerName],[TotalMemory]
As it is a single XML file for all computers, each machine will only be listed once, as the values are just
overwritten when the same client performs another logon. This means that after an upgrade
is performed, the value will be corrected at next logon for each computer, as it also would with
the InventoryXML example. All XML files generated can easily be imported into excel for further processing.
This can be expanded to collect more information.
Your Active Directory will provide information about the operating system,
so no need to collect that, but these 4 lines will collect total memory, cpu speed, disk size
and manufacturer in a single xml file:
WriteXMLValue \\AcmeServ\Collect$\SysInfo.xml,Clients/Memory/[ComputerName],[TotalMemory]
WriteXMLValue \\AcmeServ\Collect$\SysInfo.xml,Clients/CPU/[ComputerName],[CpuSpeed]
WriteXMLValue \\AcmeServ\Collect$\SysInfo.xml,Clients/Disks/[ComputerName],[DiskSize]
WriteXMLValue \\AcmeServ\Collect$\SysInfo.xml,Clients/Manufacturer/[ComputerName],[Manufacturer]
After the first two logons, the file could look like this:
<Clients>
<Memory>
<ACME0001>4080</ACME0001>
<ACME0017>2040</ACME0017>
</Memory>
<CPU>
<ACME0001>2267</ACME0001>
<ACME0017>2267</ACME0017>
</CPU>
<Disks>
<ACME0001>99</ACME0001>
<ACME0017>252</ACME0017>
</Disks>
<Manufacturer>
<ACME0001>LENOVO</ACME0001>
<ACME0017>LENOVO</ACME0017>
</Manufacturer>
</Clients>
There are built-in functions for collecting the most common system information. Most of these
are listed under "Hardware" and "Operating System" in the Engine Browser tree in the script
editor. This means that adding more lines to the above example, you can collect
information like network adapter speed, age for the computer (Windows installation date),
type of computer (desktop/portable), number of processors, free disk space, operating system,
service pack version, etc.
To collect uncommon information, use the WMIQuery function to perform a select operation through
Windows
Management Instrumentation (WMI).
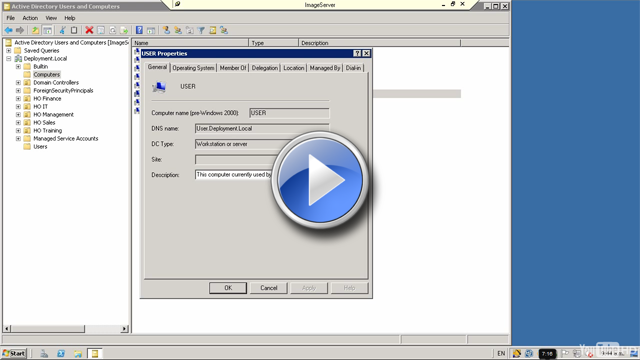
Q: I don't know who owns which computer, which is frustrating. Can this somehow be mapped?
A: This information is part of the information uploaded with SkyBox. Simply issue the
UploadInventory command in your logon script, and you have all the mappings available in the inventory
web. Please refer to
this article for more information.
If you have reservations using SkyBox or you would just like to also have this information
available elsewhere, you can update your Active Directory computer description with this information.
This can be done with a single script line at logon
(see
Setting up logon scripts) like this:
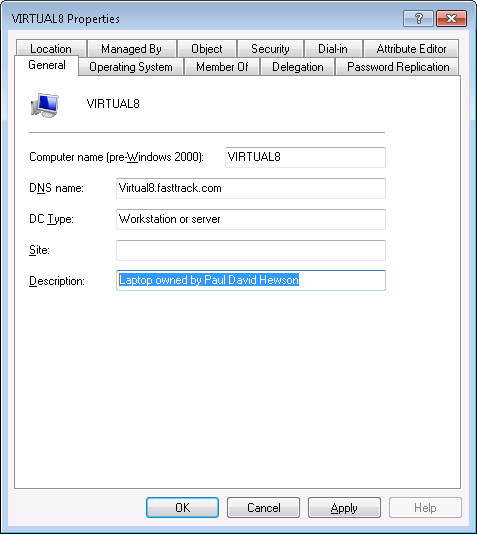
To achieve this, we need to elevate permissions to a domain admin user and execute another script to update
the information, assuming domain users do not have permissions to update the information.
We need to preserve the user name of the user logging, so this information
must be passed at command-line. In this example, the domain admin is named
"AcmeAdmin" and the password is encrypted in the script editor:
Run [FastTrackExe],/S ADComputerUpdate.fsh
/P "UserName=[UserName]",AcmeAdmin,WxTKtLAWa6yGtHhIzD/KYw==
The script ADComputerUpdate.fsh located in the same directory will extract the passed command-line parameter "UserName" and set
the Active Directory computer description field to this user name:
SetComputerDescription [ComputerName],Laptop owned by [CmdParam UserName]
A simpler solution could be to log the computer and user information at logon instead. Using an XML file for this
type of logging will avoid the problems of large log files, as each machine will only
be listed once, because the information will automatically be overwritten each time the information is written.
Putting these few script lines in the logon script, will log user and ip information on laptops to an XML file:
WriteXMLValue \\AcmeServ\Collect$\Laptops.xml,Clients/[ComputerName]/Owner,[UserName]
WriteXMLValue \\AcmeServ\Collect$\Computers.xml,Clients/[ComputerName]/LastLogon,[DateTime]
WriteXMLValue \\AcmeServ\Collect$\Computers.xml,Clients/[ComputerName]/LastIP,[IPAddress]
After logging on to two computers, the xml could look like this:
<Clients>
<ACME0001>
<Owner>David Howell Evans</Owner>
<LastIP>172.18.1.18</LastIP>
<LastLogon>08-05-2011 14:11:42</LastLogon>
</ACME0001>
<ACME0017>
<Owner>Paul
David Hewson</Owner>
<LastIP>172.18.1.16</LastIP>
<LastLogon>10-05-2011 08:49:20</LastLogon>
</ACME0017>
</Clients>
Click the play button below to watch a demonstration of the above examples.
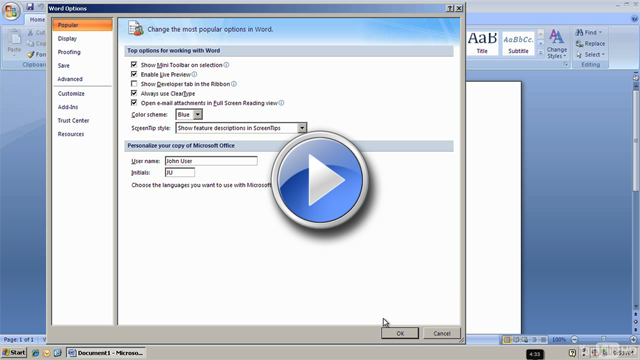
Q: Our office documents do not always have correct user information. Can this be fixed?
A: Yes, simply insert these three static lines in the logon script for Office 2007 or newer. If the user edits
the information, it will be overwritten at next logon. For Office 2003 or older, the user information is stored
in the a version sub-key instead of the "Common" sub-key.
WriteRegistry HKCU\Software\Microsoft\Office\Common\UserInfo\UserInitials,[UserName]
WriteRegistry HKCU\Software\Microsoft\Office\Common\UserInfo\UserName,[UserFullName]
WriteRegistry HKCU\Software\Microsoft\Office\Common\UserInfo\Company,Acme
Corp
Click the play button below to watch this demonstrated live.
Q: How can I backup SQL Server files?
A: There are a number of ways to backup SQL Server files. The easiest way is to
simply use the ExecSQL command. To learn about how to
interact with SQL Server and use the ExecSQL command, please refer to the
Interacting with SQL Server page.
In most cases, a history of X days of backups is preferred, to be able to restore partial data inside a database.
If a backup runs every night and there is only one backup set, then it's not possible to restore data that
were deleted the day before. The example below is an example, where a new backup is created on each run and
sets are deleted, when they are older than a configurable number of days.
Note that the script below is
available directly in the script editor. Go to the "Documentation" tab and select "SQL Server Backup"
under the "Insert Example Script" submenu.
'' ========
SETTINGS ========
Set BackupDestDir =
\\AcmeServer\Admin$\Backups
Set DaysToKeep = 2
Set SqlInstance = .\sqlexpress
''==== BACKUP
DATABASES ====
Set BackupFolder = [Var BackupDestDir]\[DateSerial]
MakeDir [Var BackupFolder]
ExecSQL "BACKUP
DATABASE AcmeMusic TO DISK = N'[Var BackupFolder]\AcmeMusic.bak'",[Var SqlInstance]
ExecSQL "BACKUP
DATABASE AcmeTravel TO DISK = N'[Var BackupFolder]\AcmeTravel.bak'",[Var SqlInstance]
'' ========
CLEANUP OBSOLETE BACKUPS ========
Loop Dir,[SubDirectories
[Var BackupDestDir]]
If [DirLastWriteTime [Var BackupDestDir]\[Var Dir]]<[SubtractDays
[Var DaysToKeep]] Then
DeleteDir [Var BackupDestDir]\[Var Dir]
End If
End Loop
To make the script run at certain times, simply create a new scheduled task on the server
and point it to the script file.
Another approach is to stop the Sql Server and simply backup the database files with SyncDir in
a service window. This approach could be preferred when there are many databases located at the
same location, as there would be no administration on backup scripts. It may also be the only
realistic option on huge databases, because SyncDir will do block-level copying of changes.
This example will temporarily stop the Sql Server service and back up all Sql Server databases located
in the C:\Databases folder on the local machine for an Sql Server instance named SQLExpress
(service name can be found in Services under Administrative Tasks in the Control Panel):
StopService MSSQL$SQLEXPRESS
SyncDir C:\Databases,\\AcmeServer\Backup$\SQL
Backup
StartService MSSQL$SQLEXPRESS
The script could run from a scheduled task.
If a scheduled task is undesired, this example will perform the operation every night at 02:00
without using a scheduled task and will log an event for traceability:
:Restart
SleepUntil 02:00
StopService MSSQL$SQLEXPRESS
SyncDir C:\Databases,\\AcmeServer\Backup$\SQL
Backup
StartService MSSQL$SQLEXPRESS
LogEvent Backup,SQL Server backup successfully complete.
Goto Restart
Citrix XenApp Installation Manager was removed on Server 2008. Any ideas?
Our recommended approach is to deploy a bootstrapper script through an MSI package via Group Policies to your servers.
To avoid re-deploying the package each time there is a change in the script/installation logic, we would recommend calling a central
script and then use the bootstrapper script (located locally on each server) solely as a bootstrapper to establish credentials and execute
the central installation logic script. The local bootstrapper script could look like this:
ConnectShare X:,\\AcmeServer\citrixadm$,Acme\Install,Akut3sRS6e3kJHztyeqg9w==
SetCurrentDir X:\Installers
Include Controller.fsh
DisconnectShare X:
In this case we are from each server connecting a share located on \\AcmeServer\CitrixAdm$,
where there is a script called Controller.fsh in the "Installers" folder in the root.
This script would contain the actual logic to install applications that are not already
installed and could optionally publish the applications to users from executing command-line
commands on successful installation. Automated installations for such a script are explained
on
the general installations page.
To deploy the bootstrapper script above to all your servers, the script must be compiled into
an .msi package. Compiling a script into a scheduled task inside an msi package is
explained on
the msi generation page.
Note that the compilation supports randomization hours to spread the load. It would
be a good idea to set the randomization hours to for example between 1am and 5am,
meaning that each server will call the central script at a random time within this timespan.
Once the bootstrapper is compiled into an msi, simply assign a software installation
through a group policy to all your servers.
How can I detect old log files and email them to someone in a zip file?
You can insert the below example in the script editor by selecting "Zip/EMail Old Files" in the "New Script" window.
The script will look for files older than the number of days specified in the "AgeInDays" variable,
in the folder specified in the variable "FileFolder". These files are moved to a temporary folder (variable "WorkingFolder") and zipped (variable "ZipFile").
The zip file is then emailed using the settings defined in the second section.
''==== VARIABLES
====
Set FileFolder = C:\LogFiles
Set WorkingFolder = C:\LogFiles\Temp
Set ZipFile = C:\Out.Zip
Set AgeInDays = 14
''==== EMAIL SETTINGS ====
Set Port = 25
Set Server = mail.acme.com
Set Sender = maildemon@acme.com
Set SenderName = "Acme Corp"
Set Username = maildemon@acme.com
Set Password = mailpass
Set Recipient = maildemon@acme.com
Set Header = Zipped files
Set Body = Please find files older than [Var AgeInDays] days attached.
''==== KILL OLD ZIP FILE AND WORKING FOLDER ====
DeleteDir [Var WorkingFolder]
DeleteFile [Var ZipFile]
MakeDir [Var WorkingFolder]
''==== COPY NEW FILES ====
Set NoFiles=0
ForEach File in [Files [Var FileFolder]]
Set FullPath = [Var FileFolder]\[Var File]
If [FileLastWriteDate [Var FullPath]]<[SubtractDays [Var AgeInDays]] Then
SmallSplash Moving [Var File]
Set NewFilePath = [Var WorkingFolder]\[Var File]
CopyFile [Var FullPath],[Var NewFilePath]
DeleteFile [Var FullPath]
IncVar NoFiles
End If
End ForEach
''==== SANITY CHECK ====
If [Var NoFiles]=0 Then Exit
''==== ZIP NEW FILE ====
SmallSplash Creating [Var ZipFile]
Zip [Var WorkingFolder],[Var ZipFile]
''==== KILL TEMP FOLDER ====
DeleteDir [Var WorkingFolder]
''==== EXEC SEND MAIL WITH ZIP FILE ATTACHED ====
SmallSplash Sending email to [Var Recipient]
SendMail [Var Server],[Var Port],[Var Sender],[Var SenderName],[Var Recipient],[Var Header],[Var Body],[Var UserName],[EncryptPassword
[Var Password]],[Var ZipFile]
If you do not want to email the file, you can strip the example of email related lines
and change the zip file name to a unique name, for example using this line as the script
line defining the zip file name:
Set ZipFile = C:\Out-[Date].Zip