EXE-to-MSI (and MSI-to-MSI)
If you need to repackage an exe based set up (or an msi based setup to add launch conditions),
into MSI format for mass-deployment, you do not need to write a script at all.
Simply start the "EXE to MSI" icon on the Home screen.
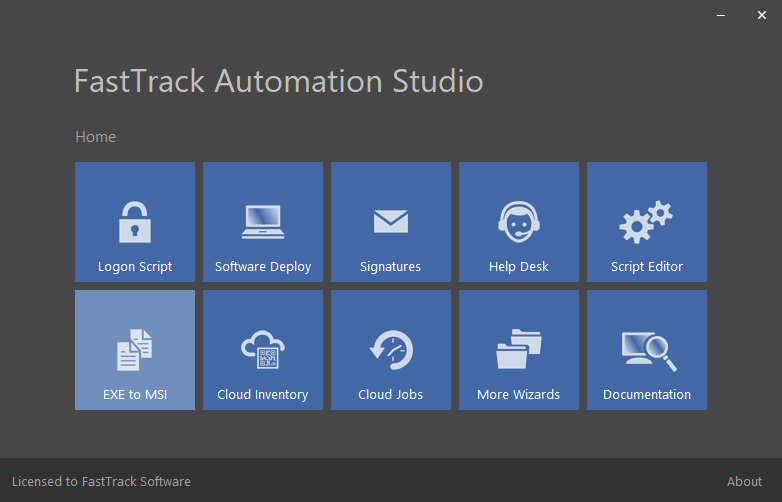
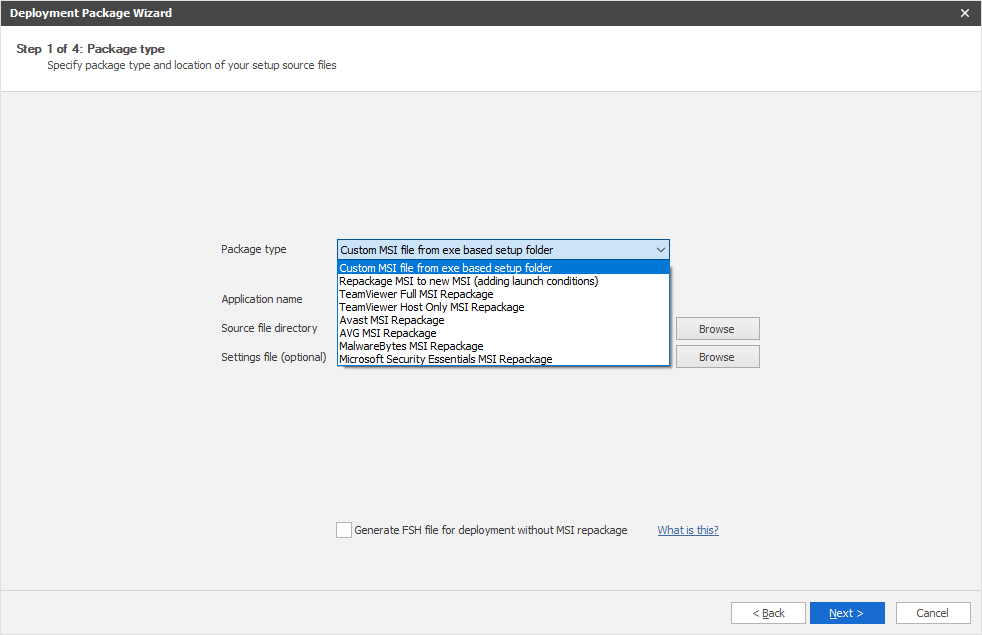
This will bring up the wizard below. It has pre-built converters for
TeamViewer,
MalwareBytes,
Avast,
AVG and
Microsoft Security Essentials (click the links to see documentation).
If you have other EXE based installers, you can select the top option, which is generic EXE-to-MSI conversion, where
you select the setup files and enter unattended switches for this product.
If you do not know the unattended switches for the setup exe file, use Google to find them. They always exist.
If you still can't find them, contact support in the top menu, and we will help you.
Launch Conditions and Group Policy deployments
All FastTrack Automation Studio wizards support launch conditions, including the EXE-to-MSI repackage wizard
and the custom MSI building wizard (explained further down).
They all have two pages, which look like the screenshots below. They basically allow you
to avoid installing the MSI package you are building under certain conditions, being either hardware
based or based on Active Directory information, such as computer group membership.
This means that you can deploy the MSI to an entire OU or container in your Active Directory
with Group Policies and avoid having it install the software on for example servers and virtual machines.
This would otherwise not be possible with Group Policies, as it's all or nothing.
In effect, this means
that you can deploy all your software using Group Policies with FastTrack MSI packages.
This is why there is also an option in the EXE-to-MSI wizard that repackages an MSI file into a new one,
as this adds blocking features.
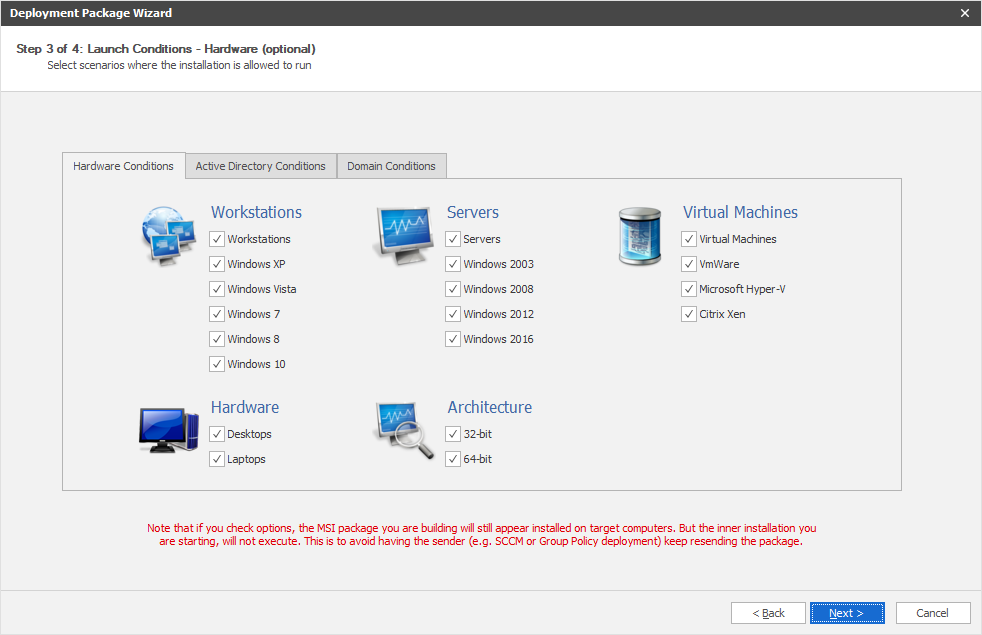
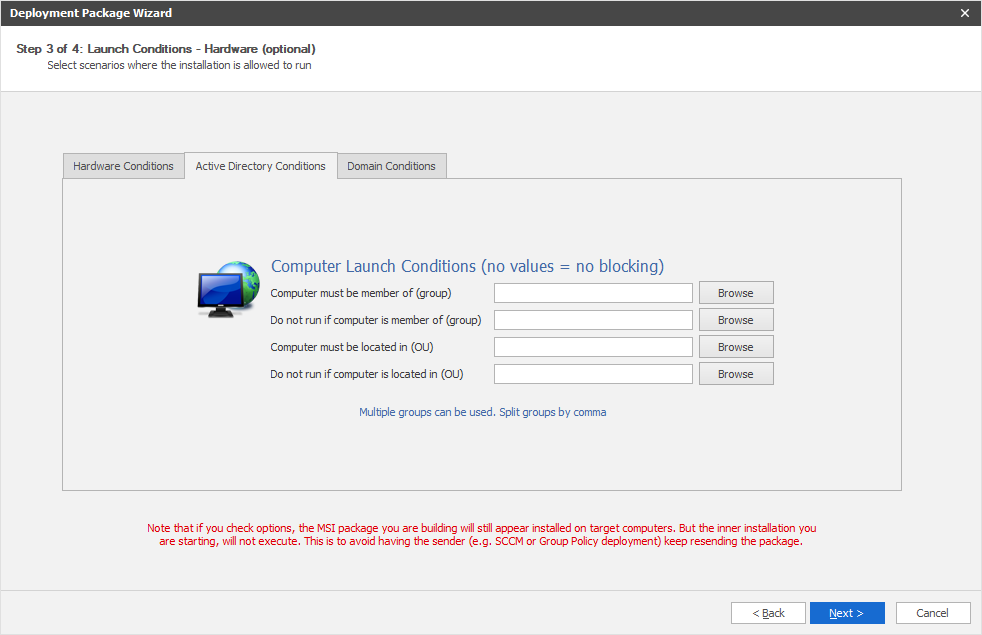
The first page lets you block on hardware and operating system. The second launch condition page lets you block based on
Active Directory information:
To understand how launch conditions work, we have to look at what a wizard does. Let's use
the EXE-to-MSI wizard as an example.
There are four scenarios within FastTrack Automation Studio to create MSI files, as shown below.
What we are doing with EXE-to-MSI is using the option to the left. The MSI that wraps around the software setup file is always
installed, but it does not do anything other than register as a program in the Windows programs list,
if it hits a launch condition blocking. This means that from the point
view of Group Policies or SCCM, the installation is always successful and will therefore never try to resend
the MSI file.

Fixing the Windows Installer simultaneous installations problem
Windows Installer has a major flaw. It cannot handle simultaneous installations (resulting in the dreaded MSI error 1618).
For this reason, MSI installation files built with FastTrack Automation Studio
will spawn the embedded installation by the end of the controller installation.
Otherwise, it would not be possible to install an embedded MSI file inside a controller MSI file.
And often times exe based setup programs use one or more MSI files as part of the installation too.
If you build your own MSI scripts (see next section), do not run msiexec.exe.
Use the InstallMSI and UninstallMSI commands, as they will wait for other ongoing installations to finish.
Creating script based custom MSI installation packages
You can also choose to build your own installers based on a FastTrack script, which is the third box from the left above.
Typical scenarios for this are:
- You used the option on the last page of a wizard to expand a script and you now need to compile it
- You need to create an MSI file, where the installer files are not embedded, but installed from a network share
- You need to create a script based MSI that not only installs an MSI or EXE file, but also modifies the machine after installation
- You have a set of own internal files that you need to create a deployable MSI installation package for
- You need to deploy a script as a Scheduled Task, a Windows Service og an Explorer startup item
This section will only give you a quick understanding of the concept; please refer to the
Advanced MSI Compilation page for in-depth details.
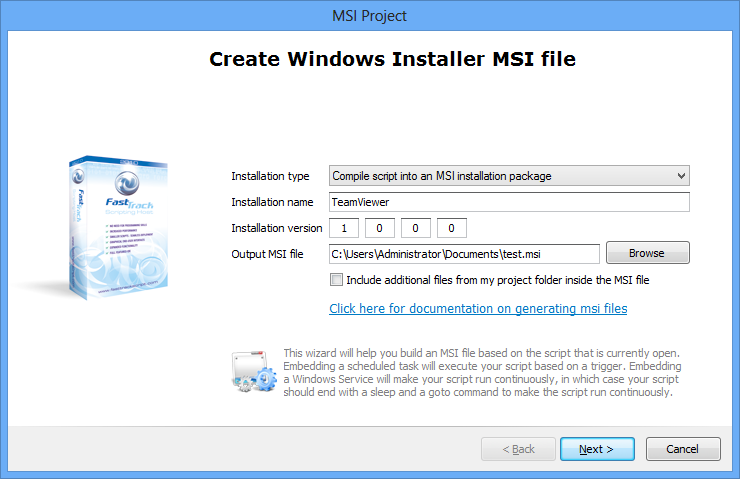
To create an MSI file, create or open a script and simply click the MSI menu item in the Script Editor - or press F12:

The wizard to generate the MSI file is very simple and intuitive and includes all launch condition options.
Fill in the basic properties for the output file and you have an MSI file based on your script.
If your script must handle installation and uninstallation, you must use the MSIInstallContext condition to determine,
if the script is currently installing or uninstalling. This is also explained on the
Advanced MSI Compilation page. Compilation into Scheduled Tasks, Windows Services
and Explorer startup items are explained further down.
Understanding editions
Let us look into which edition is most suitable for your needs. The short answer is that if your needs are only to
create or repackage MSI files for mass deployment with Group Policies or SCCM, the MSI edition is what you are looking for.
If you are looking to use FastTrack for more than that, the Enterprise edition is most likely what you should be looking at.
The table below clarifies which MSI features are available in which edition.
| |
MSI Edition |
Enterprise |
Platinum |
| Repackaging of EXE based setup (EXE-to-MSI wizard) |
 |
|
|
| Repackaging of MSI based setup (also the EXE-to-MSI wizard) |
|
|
|
| Build own custom MSI files |
|
|
|
| Include other files inside MSI files |
|
|
|
| MSI launch condition technology |
|
|
|
| Validation logic against Active Directory |
|
|
|
| Build controller installations (pulling install files from FTP, Shares, etc) |
|
|
|
| Build and deploy scheduled tasks through MSI files |
 |
|
|
| Build and deploy Windows Services through MSI files |
|
|
|
| Execute FastTrack scripts |
|
|
|
| Build custom exe files |
|
|
|
Building a scheduled task inside MSI files to deploy through group policies (Enterprise and Platinum only)
You can compile your script and optional files into a one-time installation, as shown above, but if you have the Enterprise or Platinum
edition, you can also compile your script into a scheduled task that is contained inside an MSI file,
by selecting "Compile script into a Scheduled task inside an MSI package" in the "Installation type" drop down list on
the first page of the MSI generation wizard (see screenshot above). This will produce two extra
pages in the wizard. The first one looks as shown below and the second one is for scheduled task credentials.
A good example of this is the
Deploying applications to server farms scenario.

The scheduled task option allows you to create recurring scripts that can perform maintenance, upload inventory data, or be a controller of, for example, installations to
avoid them happening at the same time on too many computers or you can enable all of these at the same time in the same script. The default trigger type "At random time every day"
is a daily trigger that spreads the daily execution at random across off-peak hours (random start and end in the screenshot above).
Random time means that the scheduled task triggers at the same time on a computer,
but the time is set to random at installation time. If, at the time of the scheduled task installation,
a computer was assigned a random trigger at 10:55, this computer will trigger at 10:55 every day.
A scheduled task using a randomized trigger time is a good way to get a trigger script installed in a server farm, as was the case with the
Deploying applications to server farms example. But it can also serve as a means to get around
User Account Control (UAC) limitations for installations. Please refer to the
UAC page for more information
on this subject. On the
Advanced MSI Compilation page, a scheduled task inside an MSI file
is explained in more detail, including trigger types.
Other compilation types
If we look at the first screen of the wizard and click the "Installation type" drop-down list, there are more
options for the behavior of the MSI file with the Enterprise and Platinum editions:
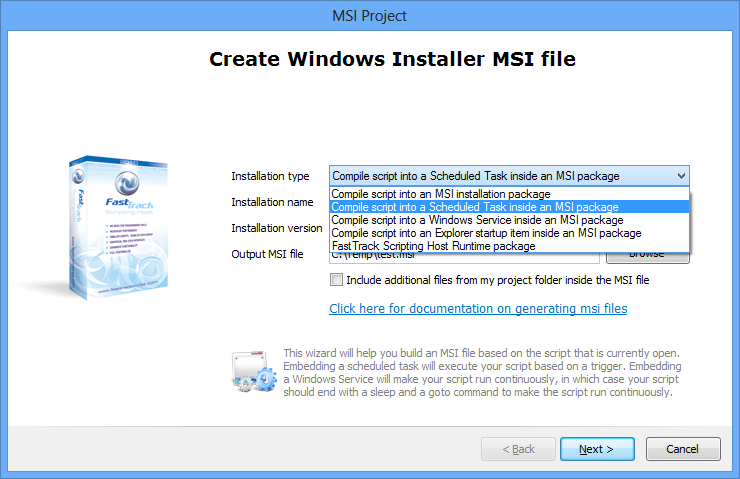
Apart from installation packages and scheduled tasks, there are three more options. Compiling into a Windows Service will make
the script execute all the time as a Windows Service. The script you are constructing must never end. This means that your
Windows Service script would typically end with a Sleep command (a break) followed by a Goto statement to go to the top of the
script to make it execute recurrently.
You can also compile a script into a Windows Explorer startup item. You can get similar behavior by using a Logon Trigger in a scheduled
task, but this trigger type is only supported from Windows Vista and newer. So if you need to execute a script when a user logs on and you don't have
FastTrack Logon set up, you can use this type of compilation to initiate the script execution, when
a user who also works with Windows XP logs on.
The last option "FastTrack Scripting Host Runtime Package" will create a small installation package that installs fsh.exe (the engine) and a
copy of your license key file into the program files directory on the executing computer. It will perform a system-wide
association of .fsh files to the installed fsh.exe file. Note that if you are using
FastTrack Logon,
it is not necessary to deploy the run-time fsh.exe to workstations. Generated MSI or exe files do not need the run-time either.
Only this last installation type will install a copy of FSH.exe. What happens is that when your MSI file is executed,
your package files are extracted to a temporary folder and executed without requiring the run-time fsh.exe to be installed
on the executing computer. The script that you opened when you created the MSI package is the boot script that is included and
executed. Once the script is complete, all temporary files are deleted. If the package is later re-installed or
uninstalled, this procedure is repeated.
The Advanced MSI Compilation page here goes through the last three sections in greater detail.