Terminology
SkyBox is the name of a cloud service that comes with your FastTrack Automation Studio licensing.
Installing a local SkyBox server, means that you replace our cloud service with a server on your own network,
using the same codebase as our cloud service.
SkyBox consists of two services: Inventory and Jobs. The Inventory service can be used without using
Jobs, but not the other way around, because Jobs use inventory data to filter Job executions.
The inventory part of SkyBox has its own documentation page
here
and cloud jobs have their own documentation page
here.
This matrix shows which features are available in which edition of FastTrack Automation Studio.
| |
Cloud Inventory
Edition |
Enterprise
Edition |
Platinum
Edition |
| Hardware inventory |
 |
|
|
| Software inventory |
|
|
|
| Geographical tracking |
|
|
|
| Custom inventory information from clients |
 |
|
|
| Ability to create and execute scripts |
|
|
|
| Cloud jobs |
|
|
|
| Push MSI files to clients using Cloud Job |
|
|
|
| SkyBox server on own network |
|
|
|
| Log events centrally (requires own server) |
|
|
|
Setting up the server
The SkyBox server is "just" a normal Internet Information Services (IIS) web site
built with Microsoft .net. This gives you, as the administrator, the most flexibility
as you get all the nice benefits of IIS control and configuration.
The server consists of two components: A SQL Server database
and an IIS web site. A wizard is available to set up the database and generate the IIS web site files
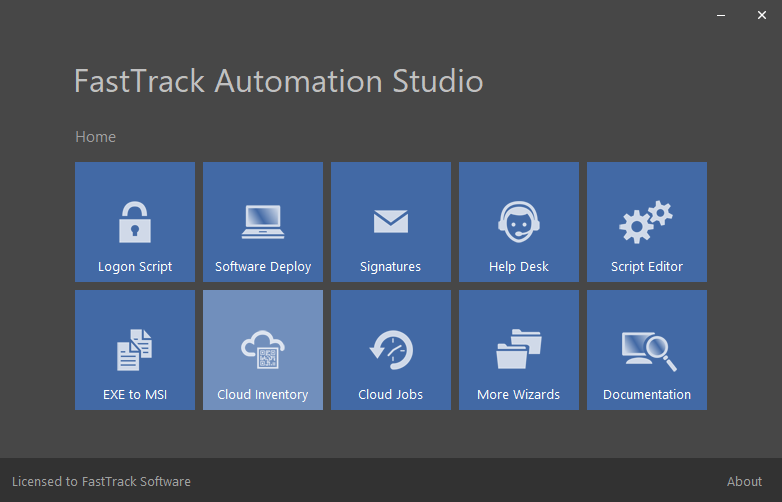
for you. Click the "Inventory" icon in the Home Screen and select the option to install a local server.
Step 1 of 2: Setting up a database
The first step in the wizard is to set up a database. You need to install a new or use an existing SQL Server and you can use
any version and edition of SQL Server. You can download the free SQL Server 2012 Express
here. The limitations in the free
Express edition have no influence on the performance of the web site, as there will be relatively few data in the database.
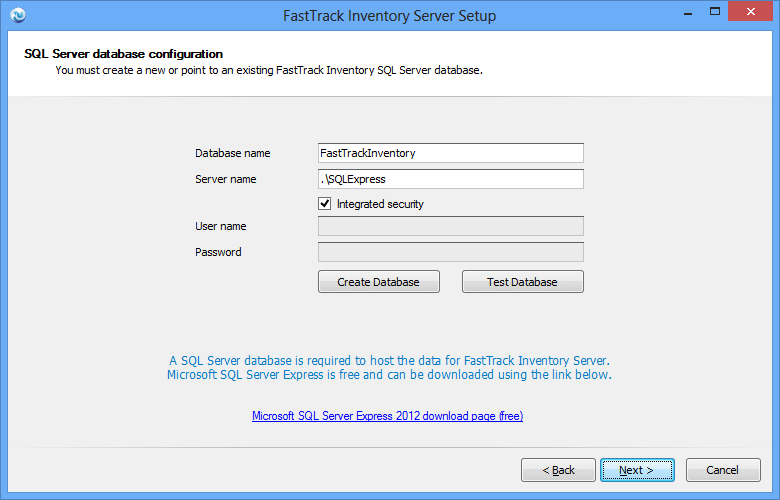
Once we have pointed to an instance name of SQL Server, we need to create a database using the "Create database" button.
If you are uneasy about having the wizard create a database in your production environment, you can set up a local
SQL Server Express, create the database on this local SQL Server instance and then move the database to your production environment.
Once you have done this, you can run the wizard again and point to the copied database. The "Test database" button
will help you verify that the database is set up correctly.
If you are not using Integrated security on your database, the credentials you use on this page will be used at run-time
on the web site. You can change the credentials in the web.config file at any time, which is located in the root
of the output web site. This is explained in more detail at the bottom of this page.
Step 2 of 2: Configuring the web site
Once the database is set up correctly, you will be able to click "Next" and get to the web site configuration page:
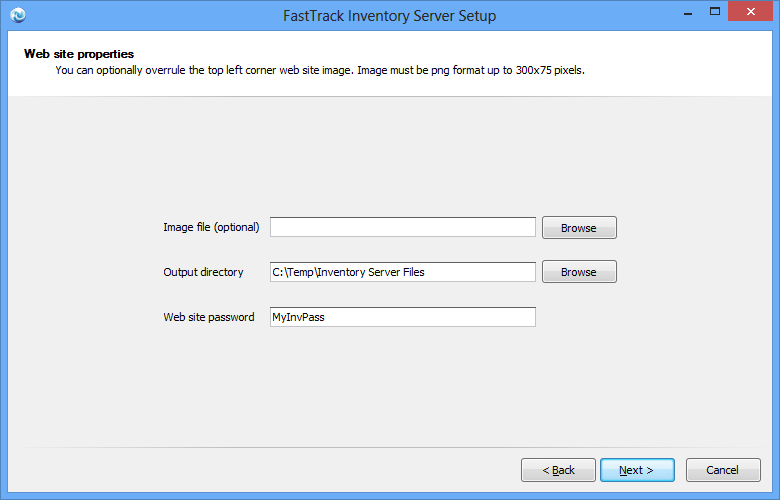
The output directory can be a production web site folder, or you can point to a local folder and copy the files manually afterwards.
The web site password is the password to access the inventory. You can change the password in the web.config file in the
root of the output web site at any time, as explained at the bottom.
The image file is an optional image to show at the top of the web site instead of the standard FastTrack one.
If you are a Data Center and you are setting up the web site for a customer, it would be a good idea to use either your
own or your customers' logo instead of the standard one.
Once the properties are set correctly, clicking "Next" will generate the files and show a confirmation page:
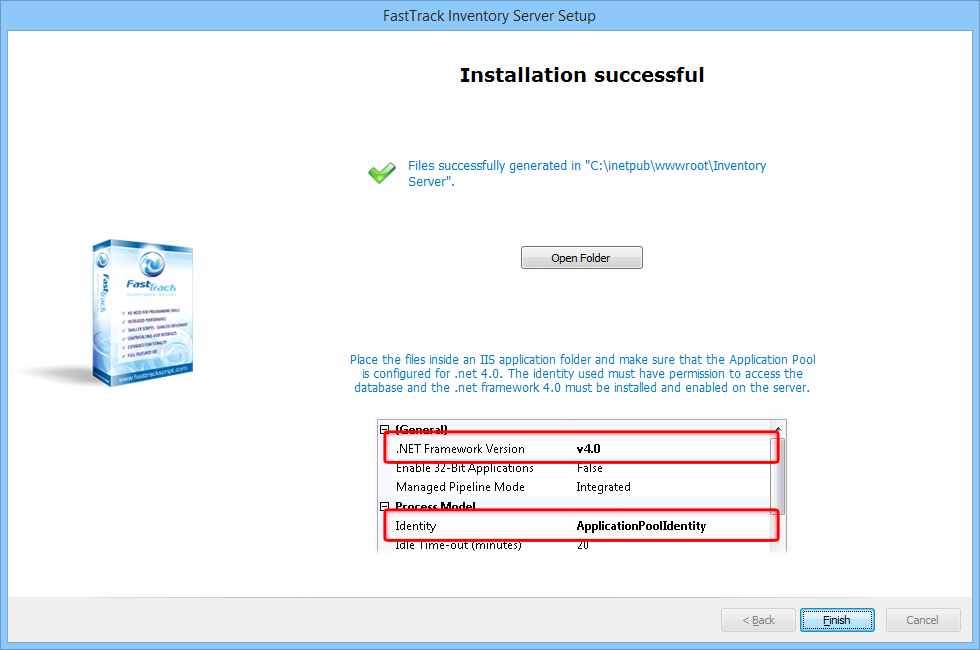
When you configure the IIS web site to host the files, you need to use the following configuration:
- .Net framework version - Select v4.0 and make sure that the .net 4.0 framework is installed and enabled.
- Identity - The Application Pool you are using must have access to the database.
- Enable anonymous access or Windows Authentication - The data uploading client is posting xml data to a sub page on the same web site.
In some case it makes sense to use multiple binding using host headers to let the uploading client use one binding and have the user of the
web site use another.
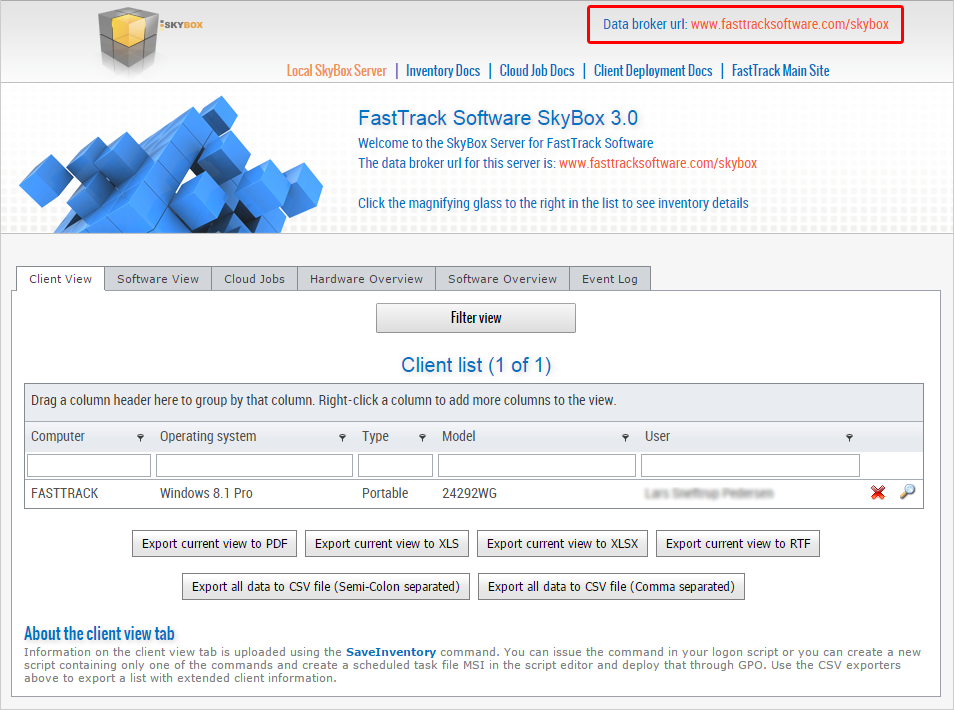
Once you have configured your web site and you log on to it, it will look as shown below. In the upper right corner, you will see
something called "Inventory Data Broker url". You need to use this address, when you use the inventory client wizard or you can use the
SaveInventory command from a script. Notice that this address is just copied from your browser address, when you look at the
web site. You may use another url that points to the same web site.
Manual configuration edit
Once you have the web site up and running, you can open the configuration properties file web.config in the root of the web site.
The password and database configuration can be edited manually in the file. The "ObsoleteAge" property tells how many days of missing
data upload it takes from a computer to be considered out of service.
<appSettings>
<add key="Password" value="nopass"/>
<add key="ObsoleteAge" value="60"/>
</appSettings>
<connectionStrings>
<add name="FastTrackInventoryConnectionString" connectionString="Data Source=.\sqlexpress;Initial Catalog=Inventory;Integrated Security=True" providerName="System.Data.SqlClient"/>
</connectionStrings>