Outlook Signatures
The most common purpose of using the Azure Active Directory (Azure AD) features of FastTrack Automation Studio is for Outlook
signatures. Please refer to
this page for more information on Outlook Signatures.
Basically you use the "Azure AD / Office 365" button to use an Azure AD property of the current user.

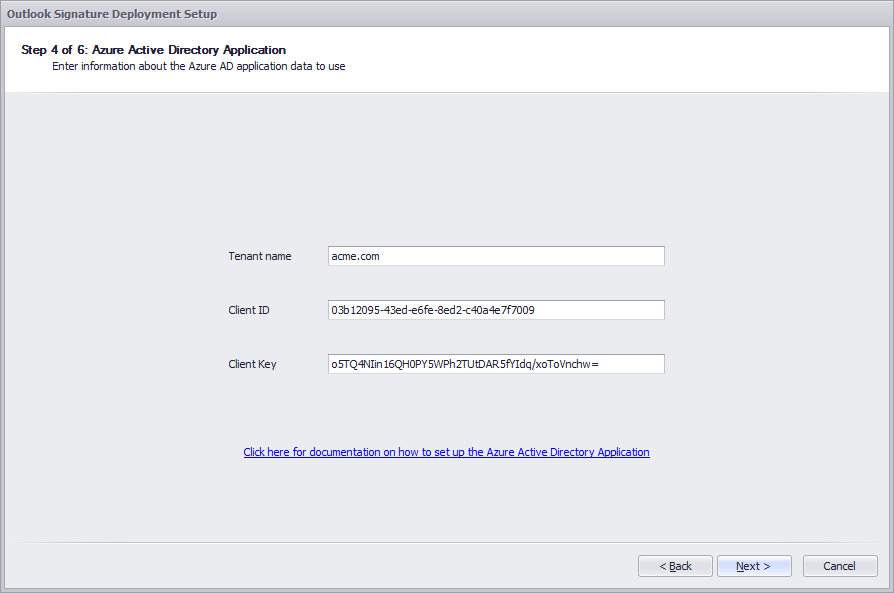
Once you build the Outlook signature application (exe or msi file), you will run into the screen below as part
of the building process. This is because your Azure AD is in the cloud and an a secure context needs to be established
to your Outlook application. This is done by defining an "Application" in your Azure AD, of which you have to enter
the security keys for. This is explained in the next two sections.
Associating an existing Office 365 to Azure Active Directory
You can skip this section, if you already have set up Azure Active Directory for your organization
In general terms Azure AD is the primary directory for all organizational Microsoft
online services including Office 365, Windows Intune and Microsoft Dynamics.
To access Windows Azure portal for your existing Office 365 subscriptions all you need is to activate a
free Windows Azure subscription on your existing account. To do this, either refer to
this blog page
or press play on the Channel 9 video below, where Matt Steele from Microsoft explains the process about 4 minutes into the video.
Setting up the Azure AD Application to access Active Directory data
To use Azure AD data for signatures or scripts, you need a client id and a client key.
Generating the application means that you give FastTrack Automation Studio permission to read
your directory data.
To generate the client id and client key, follow this procedure:
- Go to https://manage.windowsazure.com and log on with your Azure Active Directory or Office 365 credentials.
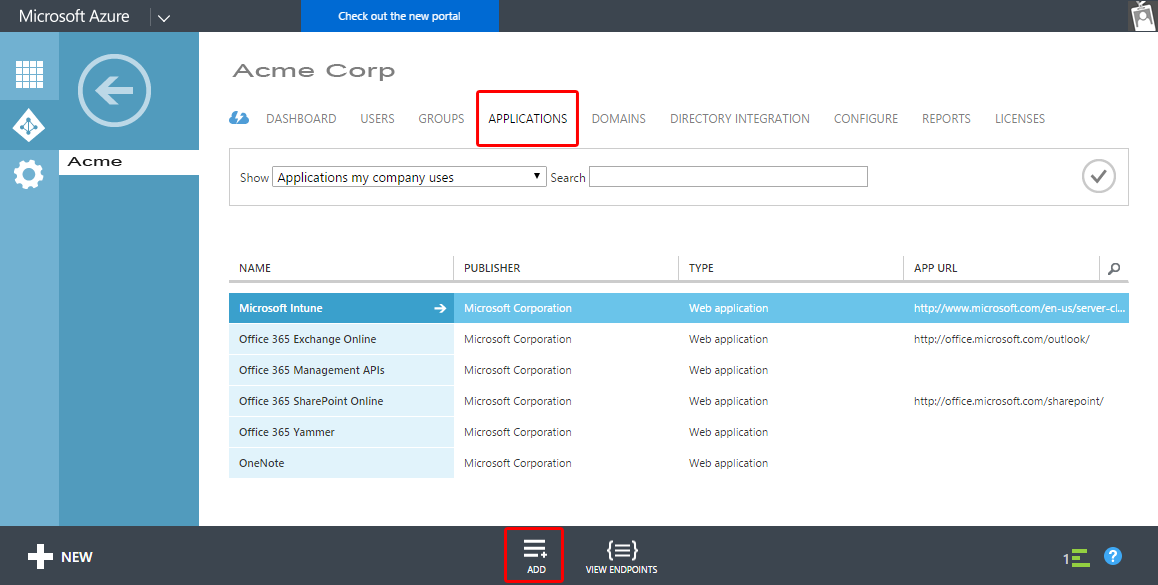
- Click the "Applications" link at the top and press "Add" at the bottom to add a new application.
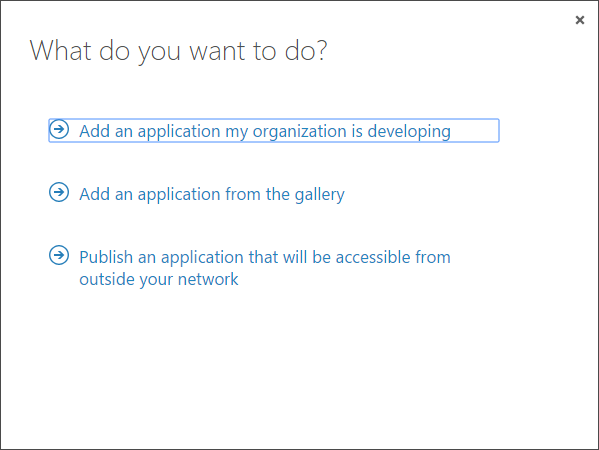
- At the pop-up screen, click "Add an application my organization is developing".
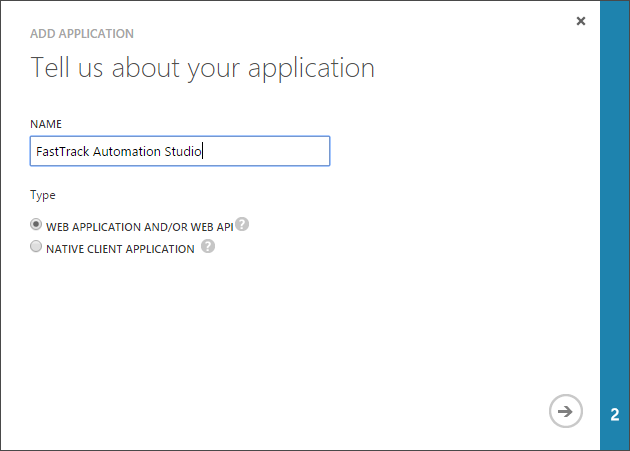
- On the next screen, enter "FastTrack Automation Studio" and leave "Web application and/or web API" selected.
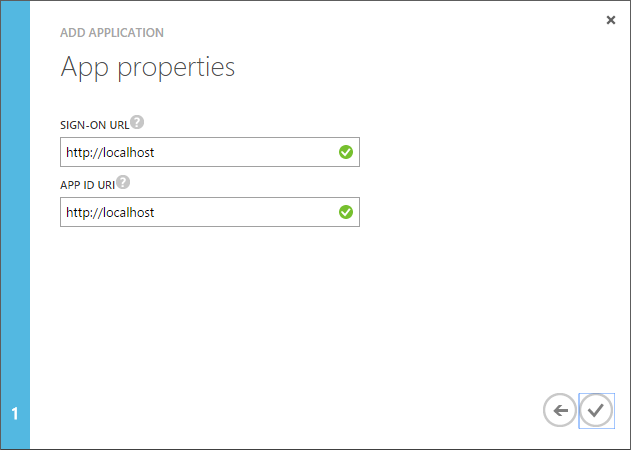
- On the next screen, enter "http://localhost" as both urls and click the checkmark to complete the wizard.
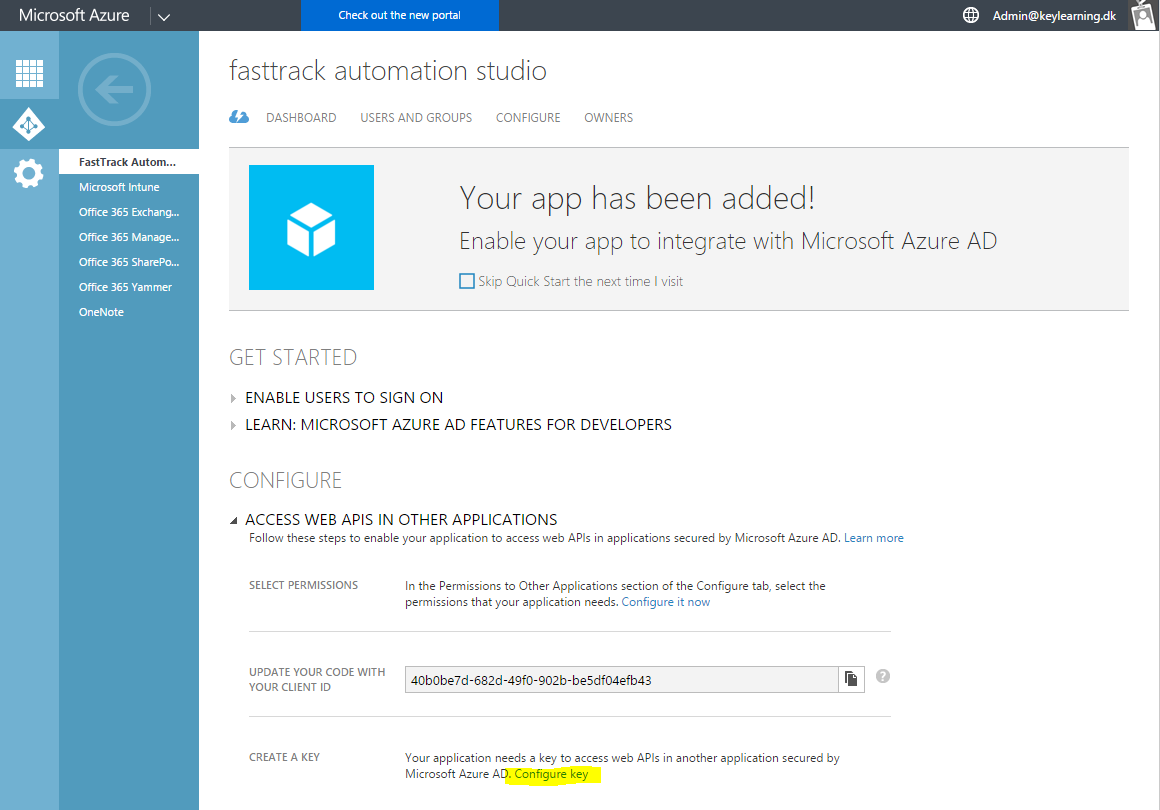
- When the pop-up closes, expand "Access web APIs in other applications" and click "Configure Key".
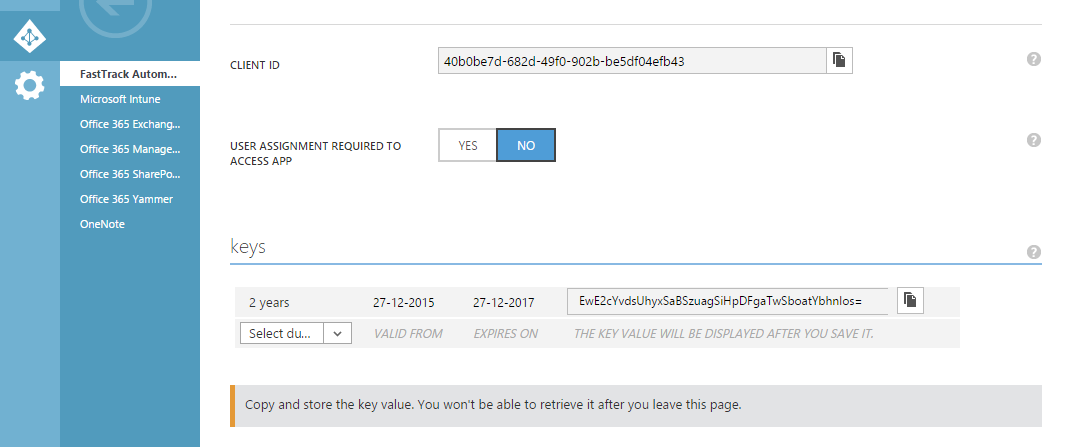
- On the page that opens, scroll down to "Keys" and create a new key. When you click "Save", you will see the key.
- Expand the "Permissions to other applications" and check "Read directory data"

- Press save at the bottom.
- Scroll up and copy the 36 digit "Client ID" and key under "Keys" (typically 44 digits) and paste them into the wizard (or for using the SetAzureApp command; see next section).
Observe it can take a few minutes, before Azure has replicated your application data and the application works!
Custom scripts
Authentication - SetAzureApp command

If you go into the Script Editor mode and you want to use say the function to retrieve the current
user's Azure AD full name for a custom exe file, you would use the function "AzureUserFullName", shown in the engine browser
to the right. As is the case, when you use the signature wizard shown at the top, you will need to set up an Azure AD application
to authenticate FastTrack to get the directory data.
Let's look at the grant flow of Azure AD:
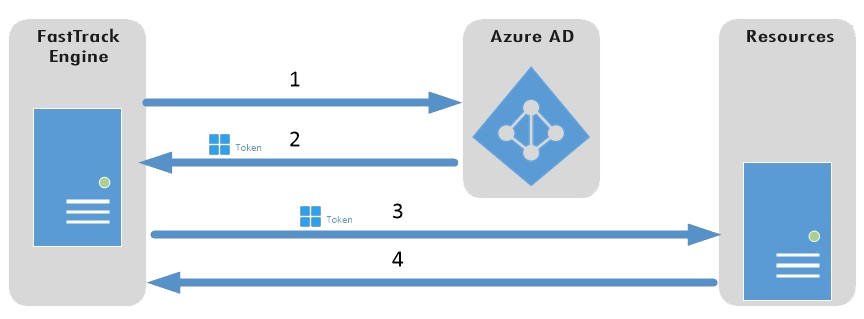
1. FastTrack authenticates to the Azure AD token issuance endpoint and requests an access token.
2. The Azure AD token issuance endpoint issues a temporary access token.
3. The access token is used to authenticate to the secured resource, in this case Azure Active Directory data (users and groups).
4. Data from the secured resource is returned to the FastTrack engine.
Luckily all this plumbing is done for you automatically. You just need to set up the application, as demonstrated in the previous section
and then pass this information to the SetAzureApp command. You will also need to pass the tenant name of your Azure AD as the first
parameter, to identify your Azure AD. An example script snippet could look like this to simply prompt a message of the full name of
currently logged on user:
SetAzureApp
acme.com,639c6519-bb4d-0e48-41dd-055f99a9066a,YhNFJRKA3GkPfQcuED3ijwiL8BWJoCN/aWkZUwuMSpQ=
ShowMessage
[AzureUserFullName]
You can get all properties of a user by using the FastTrack Azure AD functions. You can also query all groups and memberships.
Azure AD does not have Organizational Units and computer accounts, which is why there are less features under "Azure Active Directory"
than under "Active Directory" (on-premise AD) in the engine browser in the Script Editor.
Identification of the current user
When you have an Azure AD instead of an on-premise Active Directory and domain, you run into an interesting problem.
When you log on to a computer in a domain, the identity of the user is well-known.
When you use an Azure AD, the cloud identity of the current user is not well-known (unless you log
on to the Azure AD using the new Windows 10 feature). If we fire a single script line like this,
having an on-premise Active Directory...
ShowMessage
[UserFullName]
...we get a message box showing the full name of the currently logged on user. The reason
this is so simple is that all the plumbing can take place automatically by the engine.
The current user has a known account name and is logged on to a known domain. Therefore the engine
can automatically determine where to get the information and what information to retrieve.
In the case of an Azure AD, it is not always clear, who the user is.
Here is how the engine automatically tries to determine the identify of the current user:
- If the user logged on to an Azure AD, the identity is known and this identification is used. This feature requires Windows 10 or newer.
- If the user is not logged on to an Azure AD, the engine looks at all Outlook accounts and tries to find an account with the same domain name as the Azure AD tenant name.
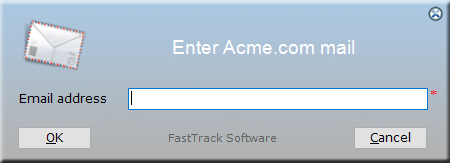
- If no Outlook account is found, only option left is to ask the user. This will look like this:
