Set up a logon script
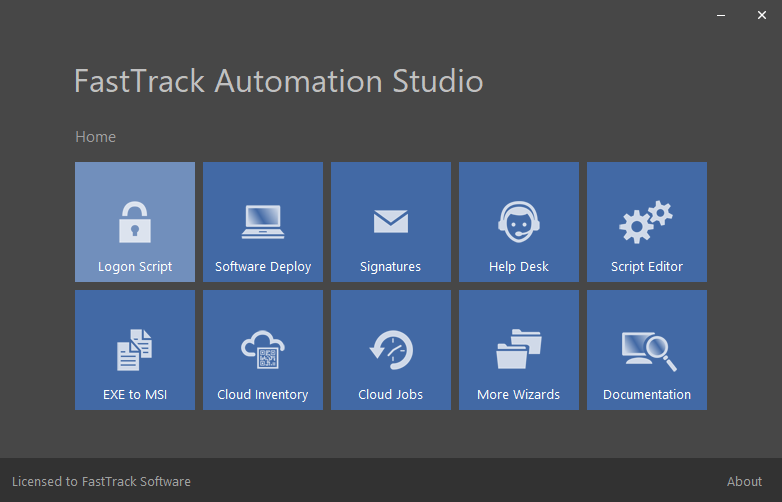
The first step to connect IP printers is to set up a logon script. You do this by using the Logon Script icon in the Home Screen, as shown below.
We will not go through this process on this page though, please refer to
www.fasttracklogon.com for detailed description of how to do that.
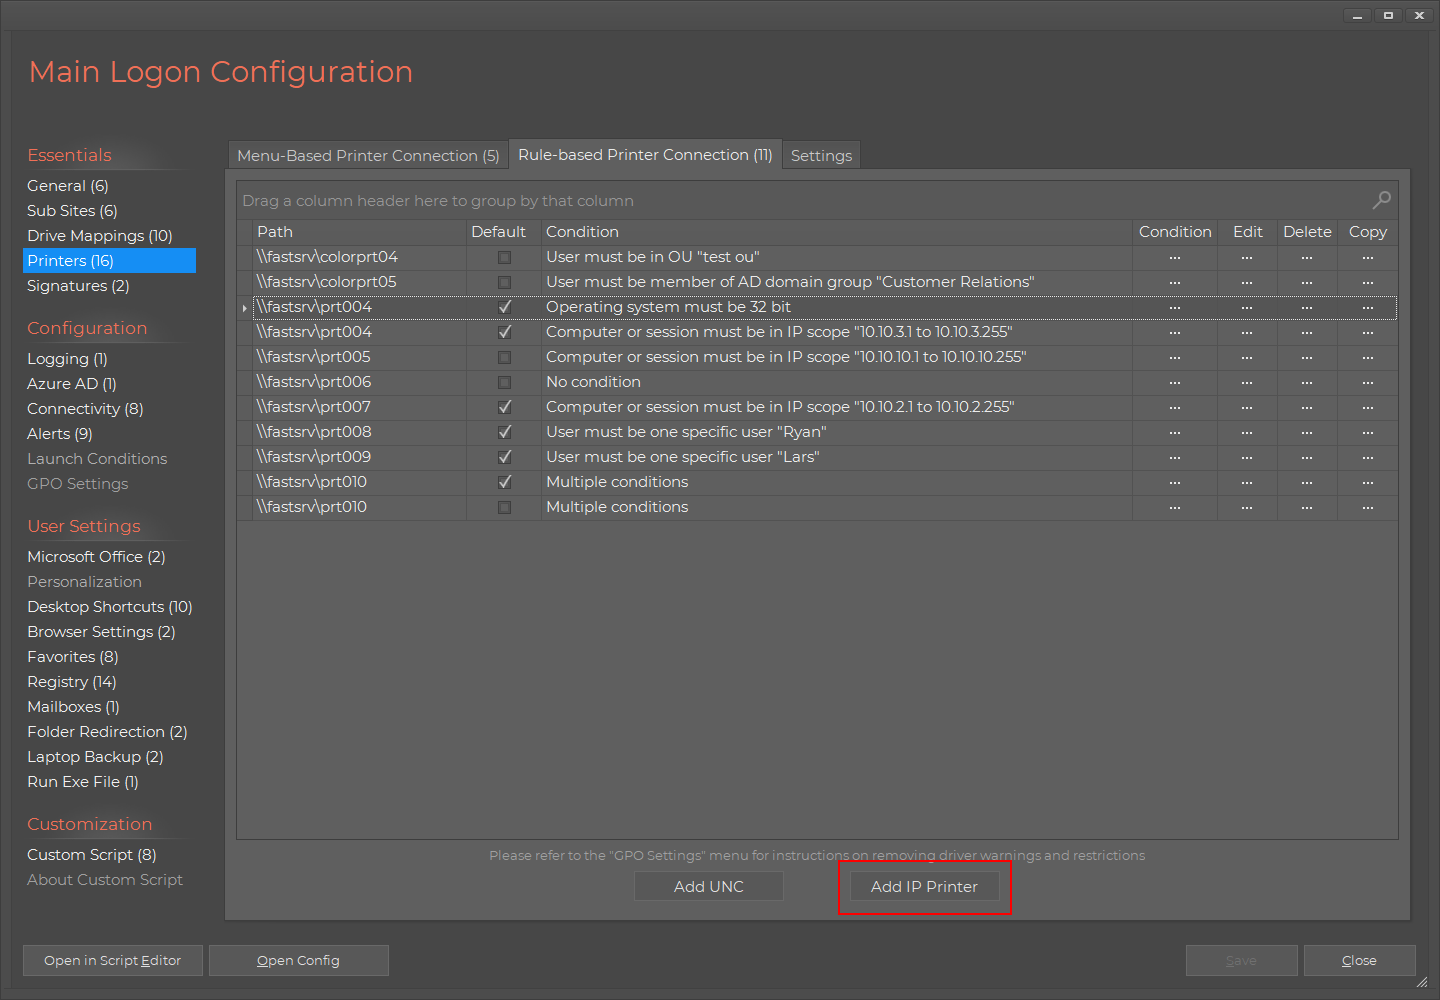
Once you have your logon script in place, you add a printer by using the "Add IP Printer" button under printers. You can mix IP printers
and print server printers and you can use IP printers both for printer menus and rule based connections.
Once you click the IP printer add button, you will see the script builder pop-up to fill in properties that looks like this:
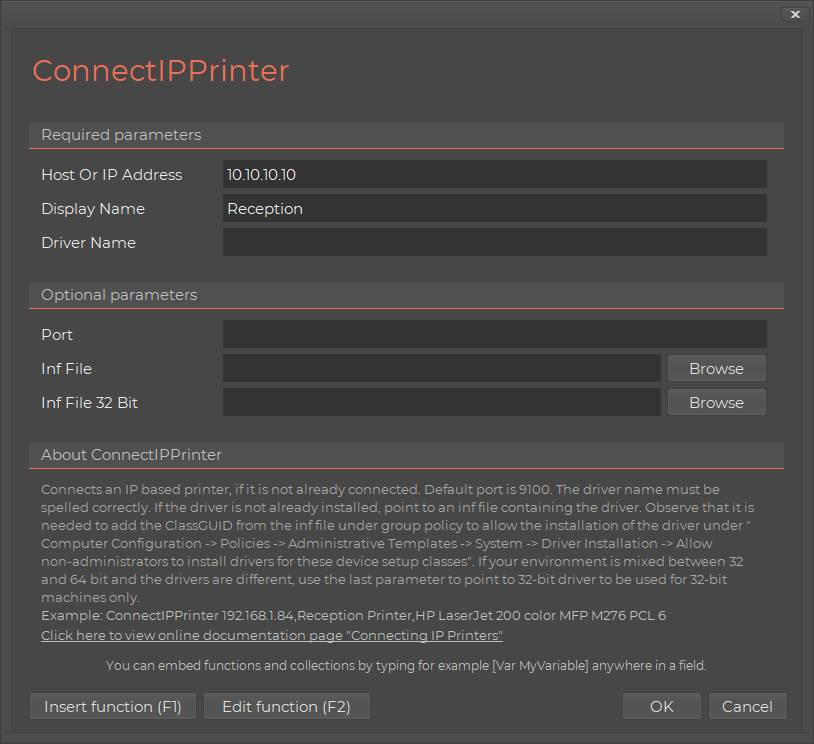
First you have to enter either
the IP address or the host name of the printer as the first parameter. There is no reason to have printers on fixed IPs, as you might
as well connect using their host names, so you do not lock the client connection to a fixed IP, in case you need to resegment your network
at a later time. The display name is the name, as it appears for the user in the printers list.
Printer driver
Next step is to fill in the driver name. There are two scenarios to this:
- You use a driver that is already installed.
- The driver is not installed, so you need to install a printer driver as part of the connection.
Scenario 1: Printer driver already installed
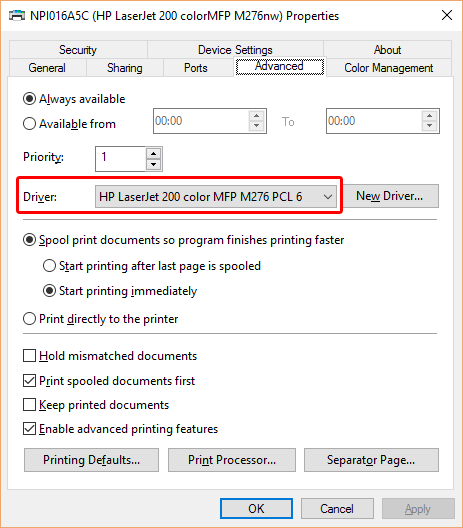
For scenario one, you need to enter the driver name. The easiest way to find it, is to look at a computer that already has the printer mapped
and click properties, as shown below. Make sure you write the text in the "Driver Name" field exactly as it appears. You can also find the name by typing
"Printui /s /t2" at a command prompt to pop-up all printer drivers installed on a computer. In this scenario, you are done. Just add more printers.
Scenario 2: Printer driver needs to be installed
If you need to install a printer driver, you need to get the driver name from the printer driver inf file and point to the location of the driver
(a directory of files including an .inf file that defines the structure). Make sure the driver location is reachable for ordinary domain users,
otherwise printer connection cannot happen. This location could be a printer driver subfolder on the netlogon share, if you do not have a more
suitable location. The reason netlogon is a good place is that all users have read permission on this location, and besides, you are already
running the logon script connecting the printers from this location. You
could type in the name of the driver from the driver inf file
and the path to the inf driver file, but to make sure that both path and name are correct, the best way is to use the browse button, because this
will also fill in the "Driver Name" field:
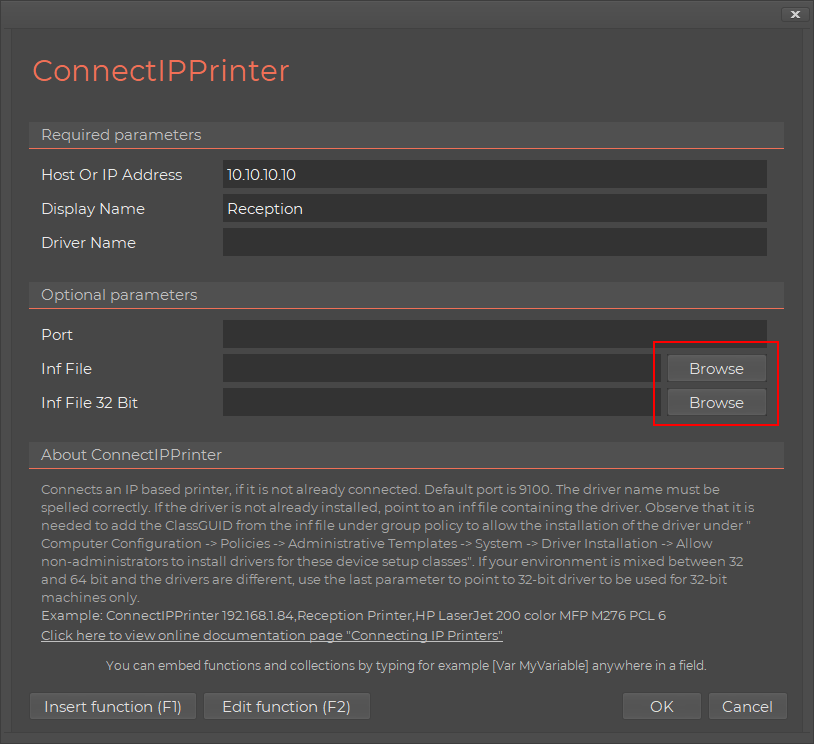
After you have pointed to the location of the printer driver (remember it has to be a public UNC location), you will see this pop-up:
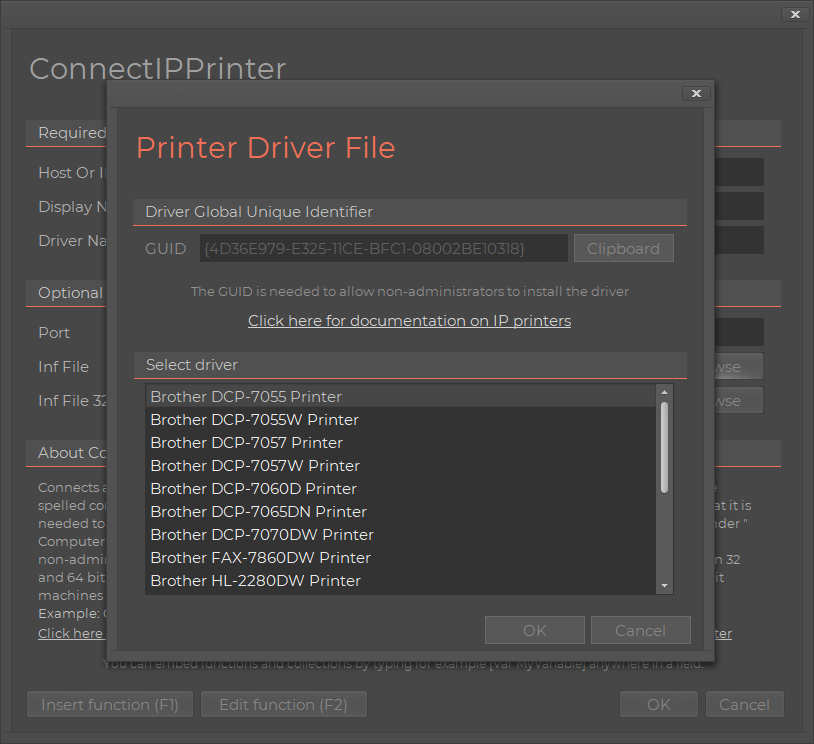
Pick the correct printer driver from the list. Once you press OK, both the driver name and path will be filled in correctly.
64 and 32 bit drivers
In case your environment still has 32-bit machines, you need to point to both a 32-bit and 64-bit driver. If you do not, leave
the bottom 32-bit field empty.
Group Policy
Domain users are not allowed to install printer drivers by default as non-administrators, but you can set a policy to
allow them to install specific drivers. This is required in this situation, where you need the user to automatically get a driver
installed. Maybe you noticed that there was a window at the top, when picking the print driver. Let's look at it again:
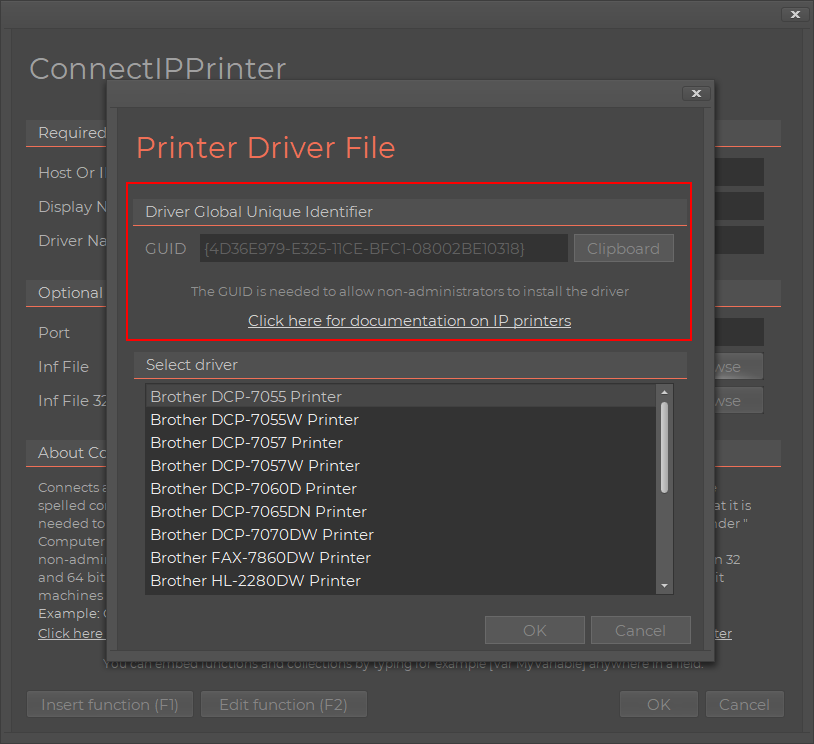
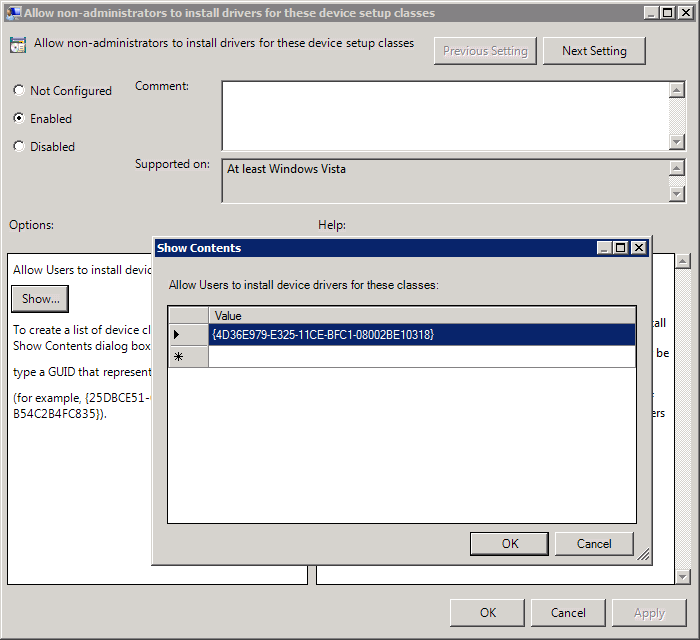
Now, the GUID (globally unique identifier) is how you tell group policy, which driver is allowed. If you use the "Clipboard" button,
this value will be copied to the clipboard. You need to open group policies and locate
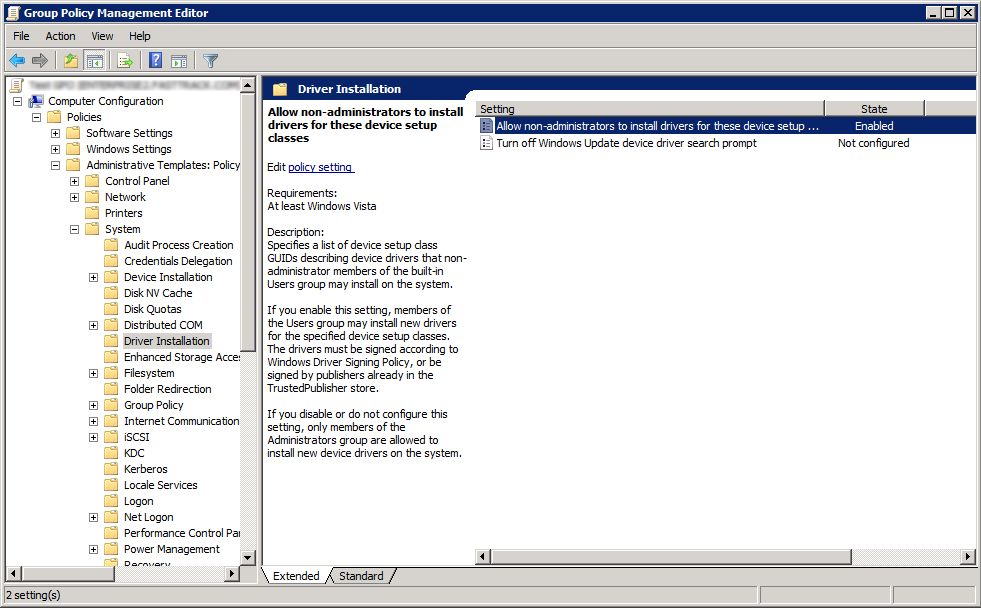
"Computer Configuration -> Policies -> Administrative Templates -> System -> Driver Installation -> Allow non-administrators to install drivers for these device setup classes".
Here you need to add the GUID using the "Show..." button, as shown below.
Final notes
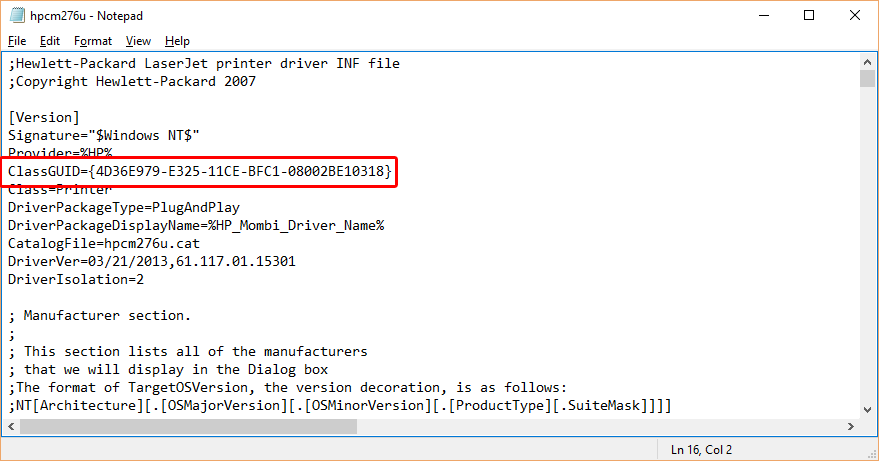
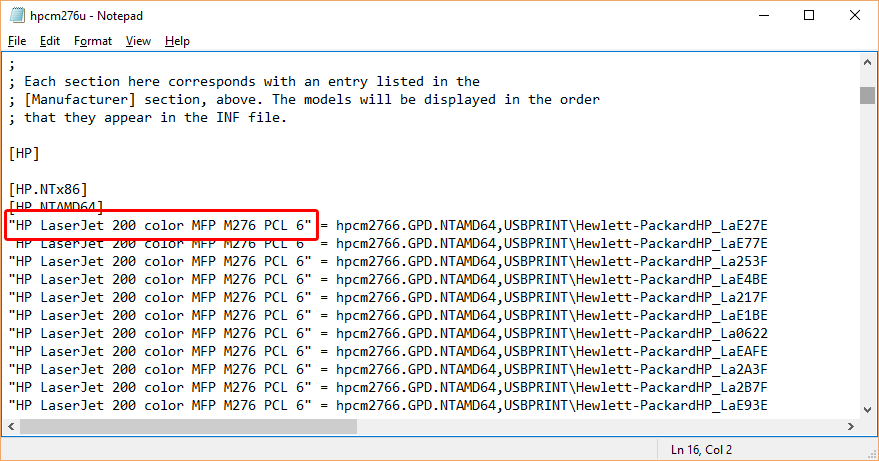
The GUID and printer driver names can also be retrieved by simply opening in the inf file in the printer driver directory.
The GUID is the "ClassGUID" at the top under the "Version" section. The driver name can be found further down in the file, as shown below.
