Pushing settings
The easiest way to deploy signatures, profiles and setting is to use the Logon Script Builder, as shown below.
You set up a configuration for a logon script through a wizard, and you are set. This is explained in greater
detail at
www.fasttracklogon.com. If you do not wish
to a setup a logon script, each section below shows you alternatives.
Outlook signature
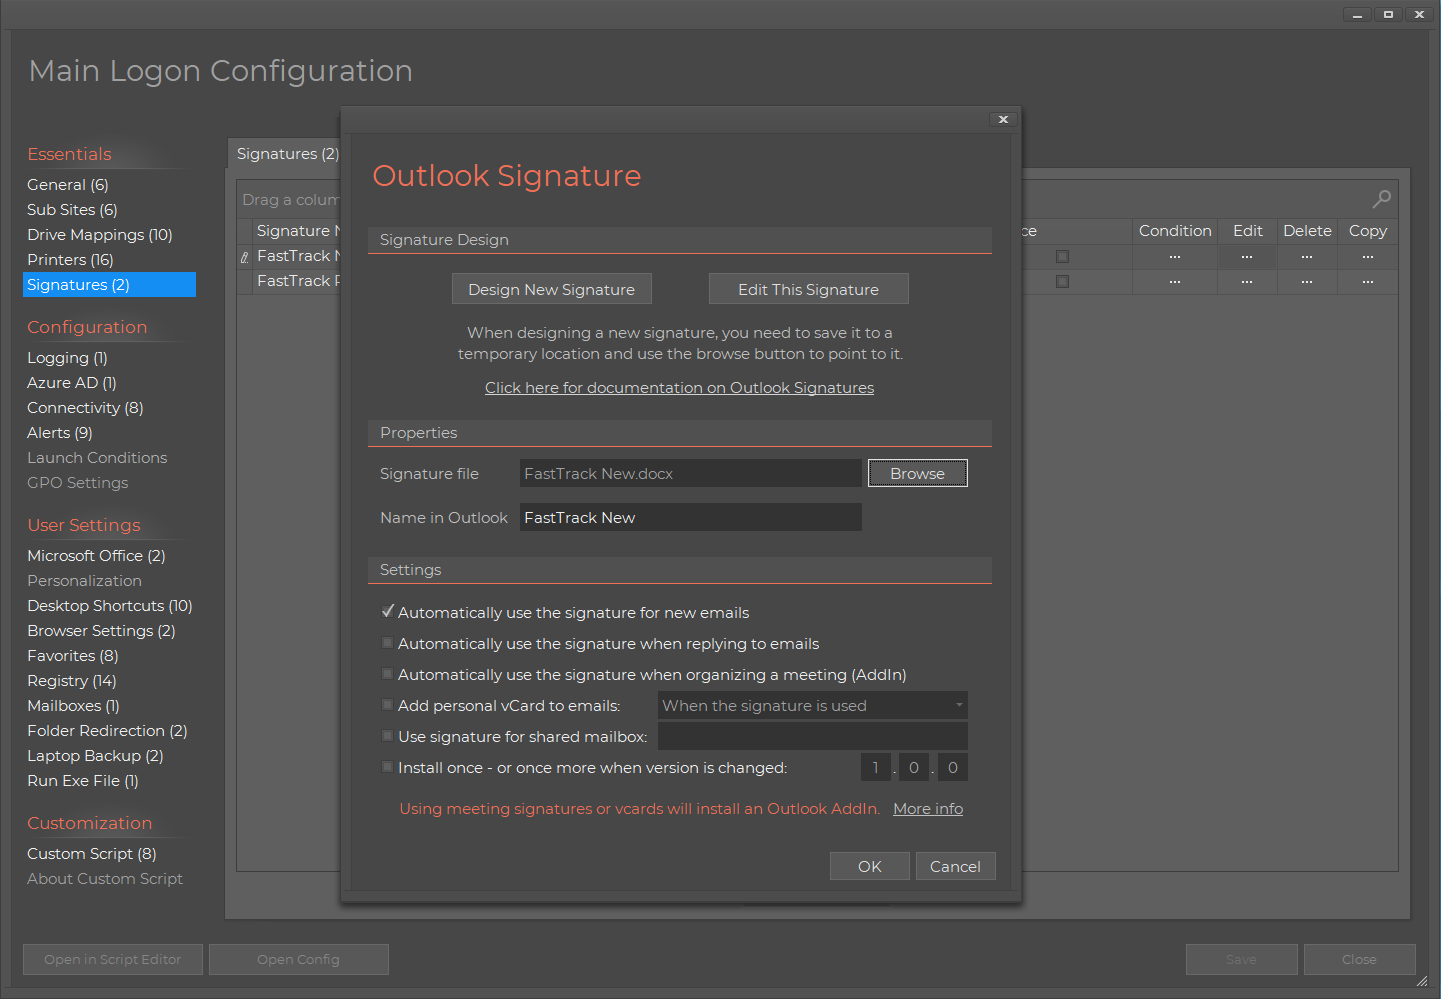
Outlook Signatures are very easy to design and deploy with FastTrack Automation Studio. The first step is to use the designer, which looks like this:
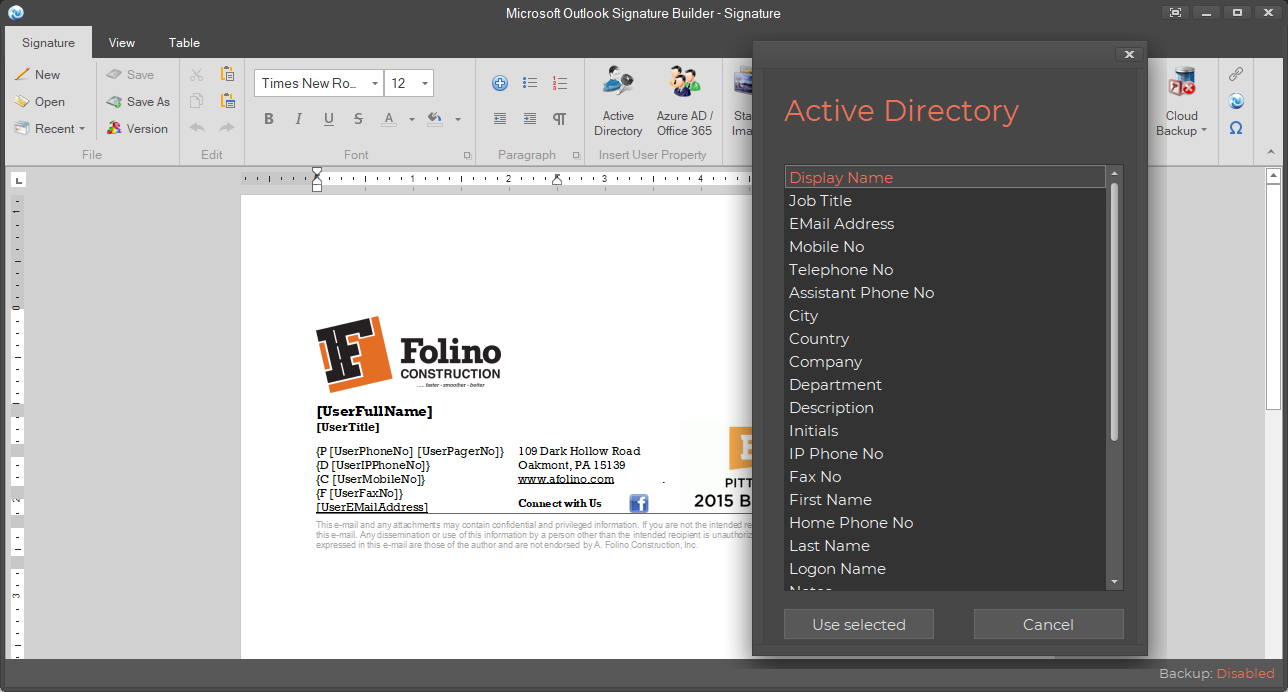
It allows you to pick any Active Directory attribute to use in the signature. Once the signature is designed,
you can either use the Home Screen wizard to build a stand-alone application (EXE or MSI file), or you can deploy through a logon
script as explained above.
Outlook Signatures has its own page for documentation on designing and deploying signatures.
Please refer to
www.outlooksignatures.com
for full documentation on signatures. There is a special Outlook edition that has basic Outlook
signature features. Here is a matrix of features:
| |
Outlook Edition |
Enterprise |
| Signature designer |
 |
 |
| Azure AD / Office 365 support |
 |
 |
| Install Once/Every time |
 |
 |
| Exe/msi deploy option |
 |
 |
| Set signature for new and reply emails |
 |
 |
| Ask user to correct AD info before install |
 |
 |
| Create desktop icon to re-install |
 |
 |
| Install multiple signatures |
 |
 |
| Logon script deployment |
 |
 |
| Lock signatures |
 |
 |
| Lock stationery |
 |
 |
| Delete all other signatures |
 |
 |
| Install to multiple exchange mailboxes |
 |
 |
| Install Exchange profile |
 |
 |
| All Enterprise features |
 |
 |
| Network banners |
 |
 |
Exchange Outlook profile
The autodiscover feature of Exchange is sufficient for most organizations and works well. As an alternative,
you can disable auto-discover and simply fire the InstallExchangeProfile command in your logon script:
InstallExchangeProfile ACMEEXCH01.ACME.COM
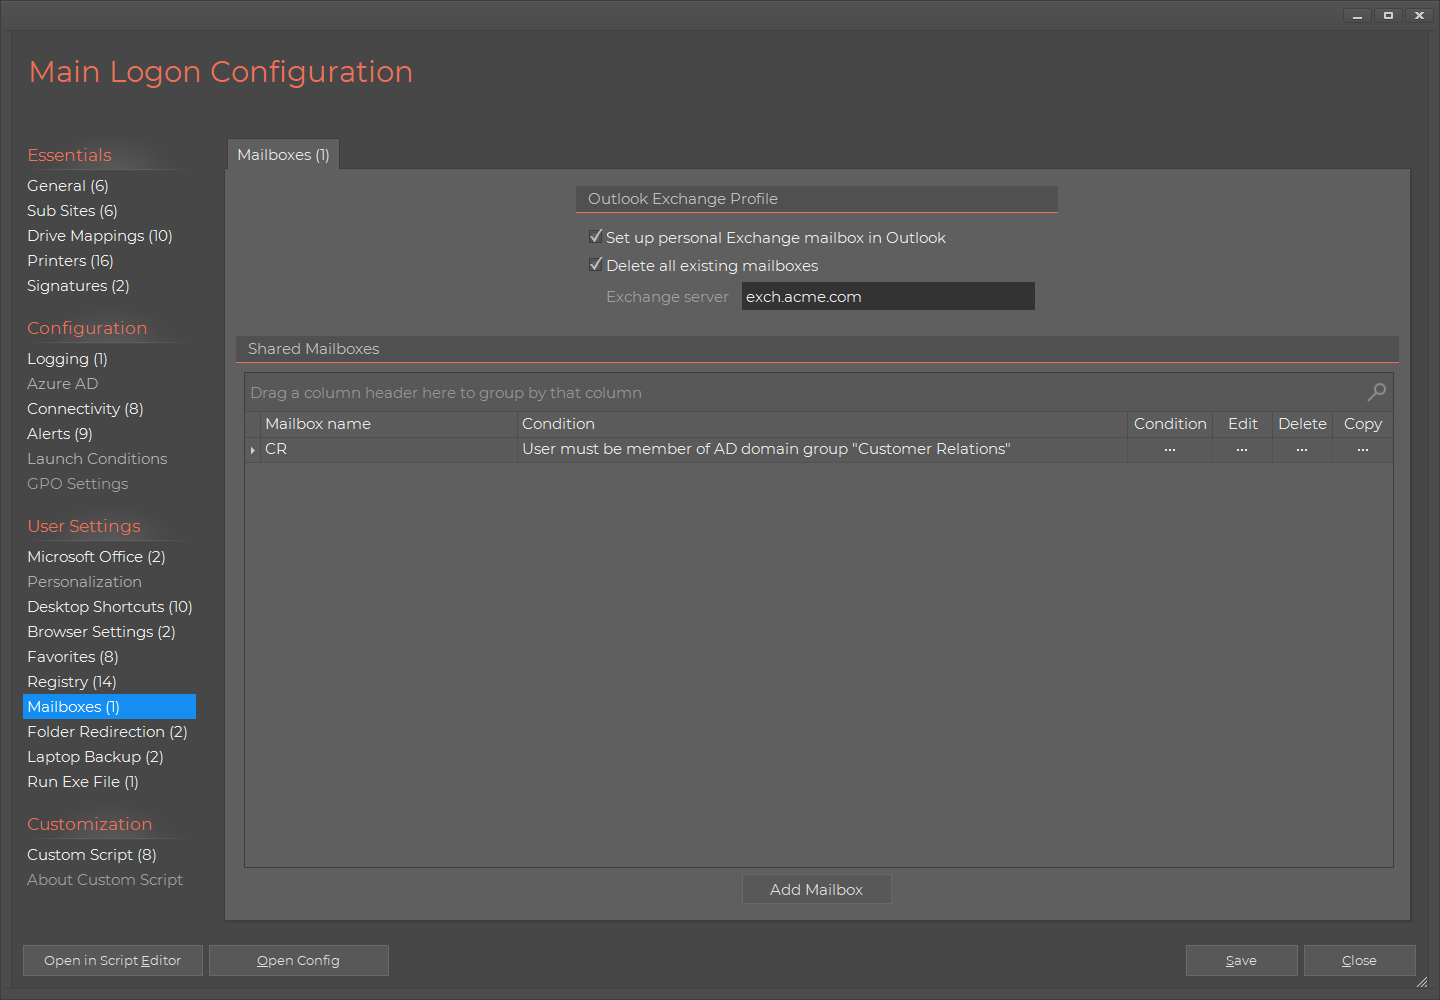
If you use the logon script wizard, this will automatically by handled for you on the "Maiboxes" tab.
Custom Outlook profile
In some cases a simple standard Exchange profile is not sufficient.
In such case an Outlook Profile file (PRF file) is the only option for automatic Outlook profile preparation.
A PRF file is a configuration file that Outlook can use to automatically set up a user profile with pre-defined accounts.
PRF files can be created using the Office Customization Tool. Refer to
this Technet page
for information on how to generate PRF files. The FastTrack InstallOutlookProfile command will use a PRF file to create
an Outlook profile using a single script line:
InstallOutlookProfile Profile.prf
The easiest way to get the InstallOutlookProfile command executed, is to set up a
FastTrack Logon Script.
To set up a FastTrack Logon Script, start the wizard from the Home Screen or from the top menu in the Script Editor.
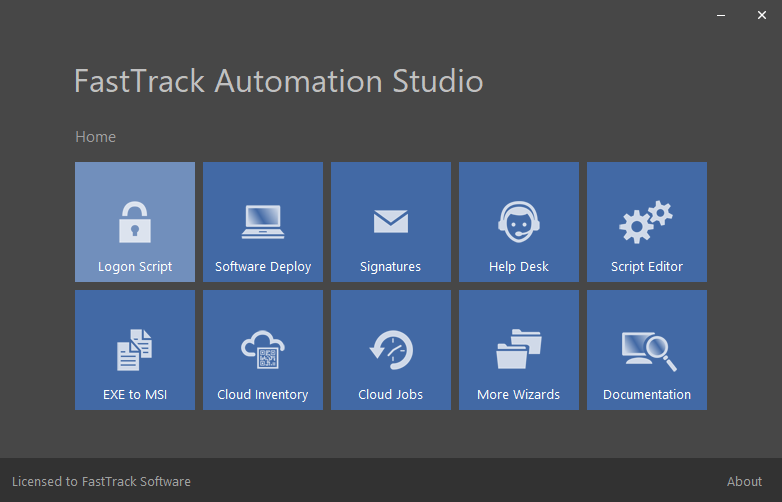
Once you have set up the logon script, use the "Edit Logon Script" option and go to the Script Editor.
Here you can append the command to the logon script. You must put a PRF file into the newly created FSHBin folder
on your netlogon share and insert the InstallOutlookProfile command
(passing the PRF file without path as the only parameter as shown further up)
into the logon script and you are all done.
You can also build a custom script in the Script Editor and compile it into an exe file to use
with your existing logon script. Or you can use the Signature wizard to create a stand-alone
application (EXE or MSI file). The Signature wizard allows you to install an Exchange profile or a custom PRF file.
Notice that if you are installing a signature and an Outlook profile in the same script,
you must use the InstallExchangeProfile or InstallOutlookProfile command before using the InstallSignature command.
This is because an Outlook profile is a prerequisite for installing a signature.
If you use the logon script or signature wizard, the order will automatically be correct.
Dynamic PRF values
The content of a PRF file is usually static, because the user's name would be represented as %UserName% in the prf file, like this:
[Service1]
OverwriteExistingService=No
UniqueService=Yes
MailboxName==%UserName%
HomeServer=AcmeServer
You can however use any FastTrack function on the right side of equal signs (as PRF files are INI files), in case you need the script to generate information.
If we defined a variable named "RealUserName", because the account should not be the same as the logged on user name,
we can use the "Var" function inside the PRF file, as shown below, where also the name of the home server is set from a variable.
[Service1]
OverwriteExistingService=No
UniqueService=Yes
MailboxName==[Var RealUserName]
HomeServer=[Var HomeServer]
Let's say we wanted to get the user name from the Active Directory description property of the executing computer
for fixed shared mailboxes, our script could look like this:
Set RealUserName=[ComputerDescription]
Set HomeServer=ACMESERVER1
InstallOutlookProfile Profile.prf
Avoiding problems with Outlooks Automatic Name Recognition (ANR)
Notice in the example above that the MailboxName has two equal signs in front of the mail box name.
This is to avoid a pop-up to the user to select mailbox, in case multiple mailboxes partially match
the specified name. The first equal sign is to split the key and value and the second is to state
explicitly that only the exact mailbox name may be matched.
If the variable contains "Paul", the value is therefore "=Paul" instead of just "Paul".
Automatic Name Recognition can however still show a pop-up, if one user logon name starts with the
same letters as a longer user logon account name. For example, user logon names ABC and ABCDEF, where user ABC would get the pop-up.
The way to get around this problem is to use the email address, which is unique. When specifying the MailboxName attribute,
we can insert a FastTrack function to get the email address of the current user at installation time:
[Service1]
OverwriteExistingService=No
UniqueService=Yes
MailboxName==[UserEmailAddress]
HomeServer=[Var HomeServer]
Multiple PRF files
Often multiple PRF files are needed (and/or multiple signatures, for which the same logic can be applied).
For example, if the user is in a certain part of the organization.
Let's say the users from the sales department need one configuration and everyone else needs another profile.
In this case, we can just place one more PRF file on the netlogon share and expand the script lines in our logon script:
If UserIsMemberOf Sales Then
InstallOutlookProfile SalesProfile.PRF
Else
InstallOutlookProfile DefaultProfile.PRF
End If
It could also be the case that there are two profiles - one for each computer type. This example
will install one PRF file on portable computers and another on desktop computers:
If Portable Then
InstallOutlookProfile PortableProfile.PRF
Else
InstallOutlookProfile DesktopProfile.PRF
End If
It is easy to use any other kind of logic, such as using the UserIsInOU condition
to determine Organizational Unit. The page
here
explains how to create advanced logon scripts, which also covers the most typical conditions you
would apply to profile and signature logic.
PST file backup
Backing up PST files (
Personal Storage Table)
is a classic nightmare for any systems administrator, because they are often huge in size and many users simply abuse the possibility
to store unlimited information.
Users may save PST files in multiple folders, making it difficult to back them up automatically.
But if you want to backup the user's PST files, there is a command to do so named
"BackupPSTFiles" to solve this problem. It is a specialized version of the SyncDir command, which is a performance optmized
synchronizer that operates on a block-level for large files, making it especially ideal for PST files.
If you are interested in the mechanics of this command, please refer to
SyncDir page for more information.
As part of the logon script wizard, you can include use of this feature:
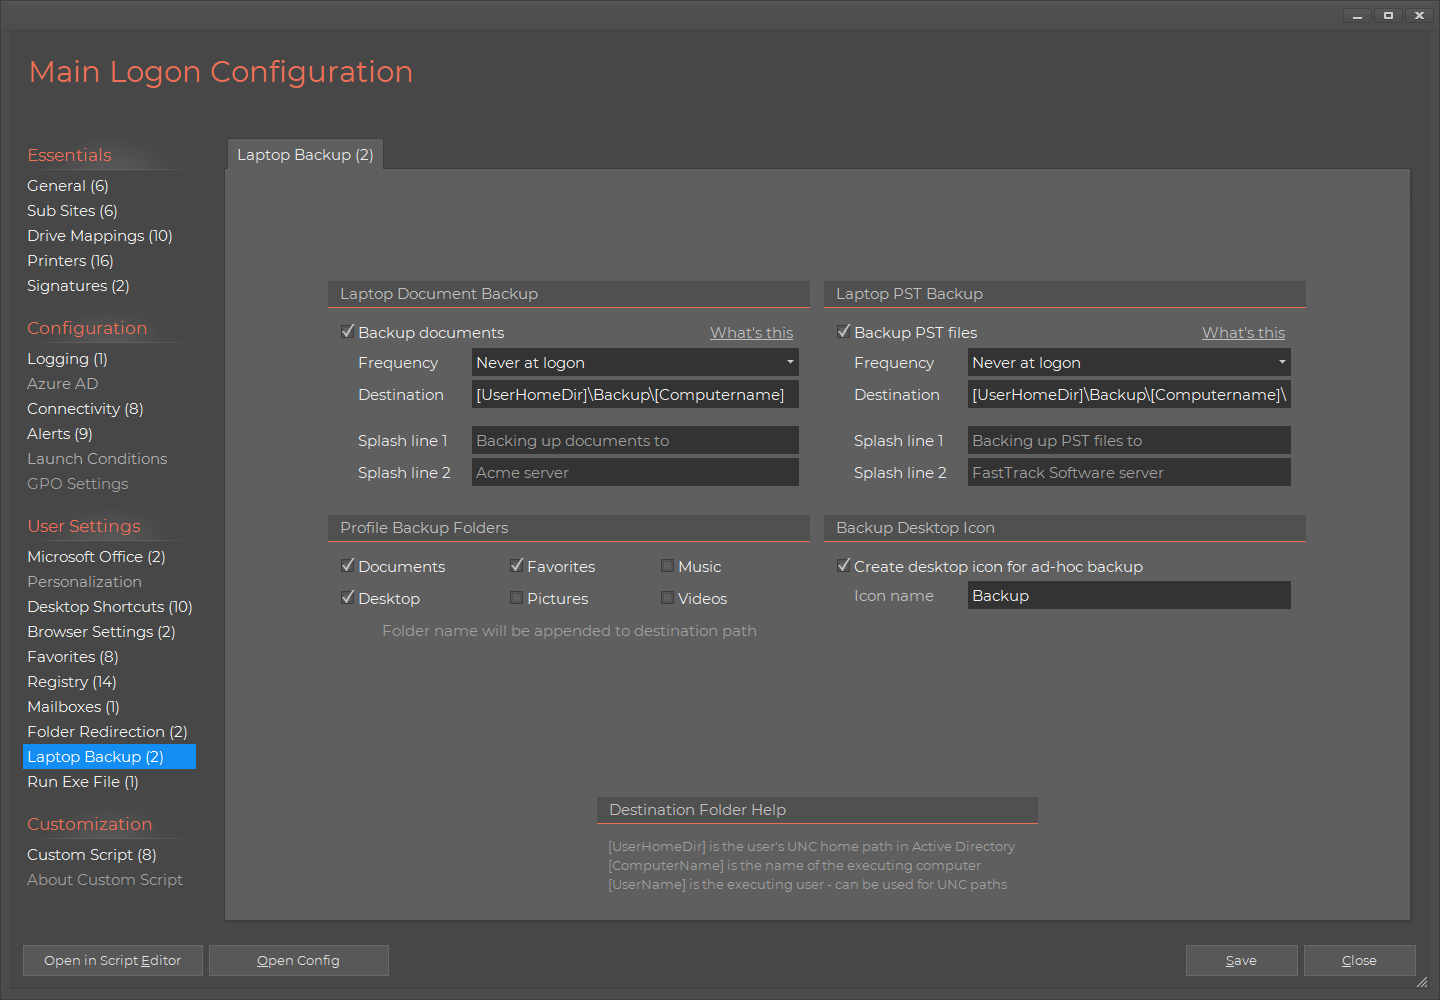
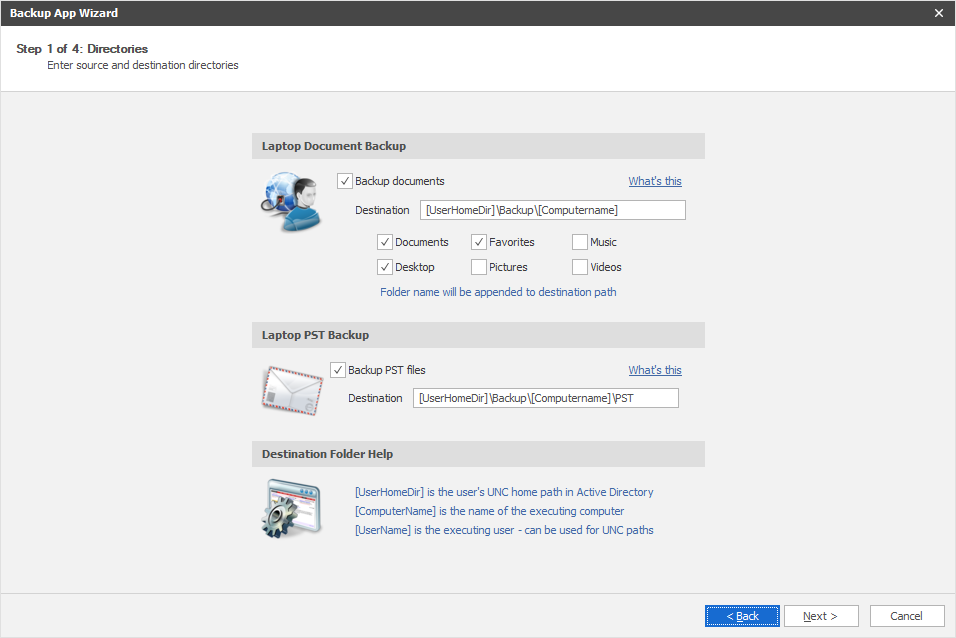
If you do not like to backup the PST files as part of your logon script, you can use the "Backup App"
wizard from the Home Screen. This will allow you to create either an unattended exe file to backup
or to create an ad-hoc exe file for users to start. In the middle page of the wizard, select PST
as the source directory.
Extracting information from Outlook
You can extract information about OST (Off-line Storage files) and PST files from scripts and you can also
extract mapped accounts. This could be relevant in a logon script to determine,
if users have mapped unauthorized accounts. There are three collections named "PSTFiles",
"OSTFiles" and "OutlookAccounts". The first two will return the file names of all OST or PST files and
the last one the email addresses of all mapped Outlook accounts. Displaying all PST files could look like this:
List PST Files,[PSTFiles]
We can also use the OutlookAccounts collection to create a file for each user on a hidden network share
with a list of Outlook accounts for each user, as shown below. Using the UserName
function as part of the file name will create one file for each user. These lines could be
used from a logon script to log all mapped Outlook user accounts for all users on the network.
DeleteFile \\Server\LogFiles$\OutlookAccounts\[UserName].log
ForEach Account in [OutlookAccounts]
AppendFile \\Server\LogFiles$\OutlookAccounts\[UserName].log,[Var Account]
End ForEach
Deploying a signature through a custom logon script
On the
signatures page, it is shown how to deploy using the Logon Script Builder that looks like this:

You can also write a small script snippet yourself in your logon script, after you used the setup wizard.
This would be the case, if you have build a logon script manually, not using the logon script wizard.
You can press play on the video below to watch Ryan Akers from SrekaIT walk you through the process
of manually writing a script for Outlook signatures, as part of a logon script.
Essentially you must save your signature to the "fshbin" folder on your netlogon share, where your logon script is located.
If the above file was saved as "AcmeSig.docx" to the fshbin folder on netlogon, all we need to do is to insert these lines
into the prelogon.fsh file. Note that if you used the logon script wizard to create the initial script, these lines are already created for you.
InstallSignature AcmeSig.docx,Acme Corporation
SetNewEmailSignature Acme Corporation
SetReplyEmailSignature Acme Corporation
Basically using these three commands is what the wizard really does behind-the-scenes. The first command will install or overwrite an Outlook signature.
The last two commands are for setting the signature that is used for new emails and when replying to emails. If these commands are not used,
a signature is installed, but not automatically selected. You can also use the InstallDefaultSignature instead, which is the same as using all three commands in turn.
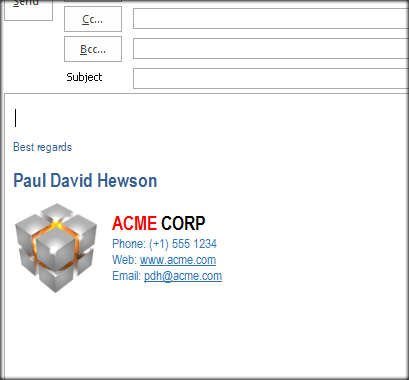
Using the example above, a new email from a user named Paul David Hewson looks like this:
Using multiple signatures in an organization
If you use the Professional, Enterprise or Platinum edition, you can build logic into your logon script.
You can use simple conditions to determine which signature template file to install through the InstallSignature command.
You can use a simple condition like UserIsInOU to install a signature only for users in a specific OU.
Or you can check IP scope, logon server, use geodata (city) or any other FastTrack condition,
to determine the correct signature to use. You are welcome to contact FastTrack Support using the "Contact"
menu at the top menu, if you need more information on how to do this.
The example below installs one signature for users in a certain group and another for everyone else, assuming both files are located
in the same folder as the logon script (the FSHBin folder on netlogon). The InstallDefaultSignature
produces the same result as using InstallSignature, SetNewEmailSignature and SetReplyEmailSignature in turn.
If UserIsMemberOf Sales Then
InstallDefaultSignature SalesSignature.docx
Else
InstallDefaultSignature DefaultSignature.docx
End If
When Active Directory attributes are not always current
If you use the Professional, Enterprise or Platinum edition, you can choose not to build a simple deployable exe or msi package.
Instead you can use the exe building feature of FastTrack Automation Studio's Script Editor to build a custom exe application.
If your Active Directory is not current with all information, it is not possible to push a signature automatically.
In this case, you can build an exe file that users can start that pre-populates fields with Active Directory information,
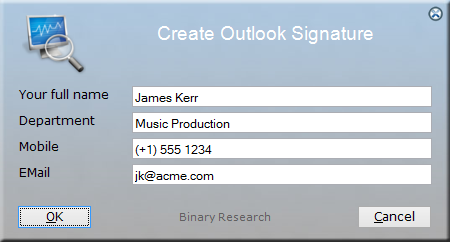
but lets users overwrite information before installing the signature, as shown below.
Building a signature application is covered on a separate page; click
here to go to the page,
which is a FastTrack script of only 8 lines that can be compiled into an exe file.
