Nuts'n'bolts or point'n'click?
Let's rewind a bit and look at the overall picture, to get an understanding of best way to do it in your case.
There are generally two approaches to solving the software distribution problem.
This page outlines the nuts'n'bolts approach, which is a little bit more work in return
for more flexibility. With this approach, you go into the Script Editor and create a scheduled task
MSI package and then write your own script to handle everything. This way you get the full might of
the scripting language, which has about 1500 commands.
The other simpler way is to use the Software Deployment wizard,
which is explained
here. This approach is purely
point'n'click and is usually the best way. This wizard is actually based entirely on the solution
explained here, wrapped in a wizard that will write the actual install script that you would otherwise
have to write yourself. But you are of course limited to what features, it can write scripts for.
This is what the wizard looks like:
If you find the Software Deployment wizard to fulfill
your needs, that is probably the best way to go. If you feel you need to do complex work, not only
installing the software itself, the approach outlines here may be the better way to go. Read on for
the first nuts'n'bolts approach.
Step 1: Deploying a bootstrapper script to all servers
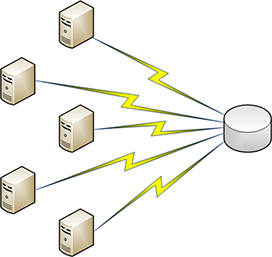
The approach is to deploy a bootstrapper script once and for all through an MSI package via Group Policies to all servers in
the farm and then handle all installations from one single central script.
This approach is to avoid (re)deploying MSI packages each time there is a change in the set of applications to install.
The central script must to be called once a day from each server and the local bootstrapper script is solely
a means to establish credentials and get the central installation script executed.
The locally installed bootstrapper script could look like this:
ConnectShare X:,\\AcmeServer\citrixadm$,Acme\Install,Akut3sRS6e3kJHztyeqg9w==
SetCurrentDir X:\Installers
Include Controller.fsh
DisconnectShare X:
Each server is connecting the share \\AcmeServer\CitrixAdm$,
where a script called Controller.fsh in located in the root "Installers" folder.
This script would contain the actual logic to install applications that are not already
installed (see step 2).

To deploy the bootstrapper script above to all the servers, the script must be compiled into
an MSI package first to be distributable. When the above script is open, click the "Compile to Msi" button
in the script editor or press F12.

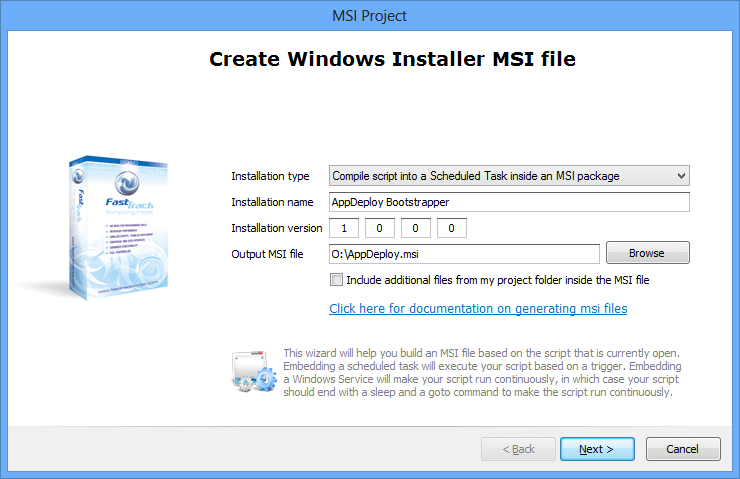
When the MSI window is open, select "Compile script into a Scheduled Task inside an MSI package". This will insert two scheduled task pages
after the initial welcome page. Note that the compilation supports randomization hours to spread the load. You can change this random interval
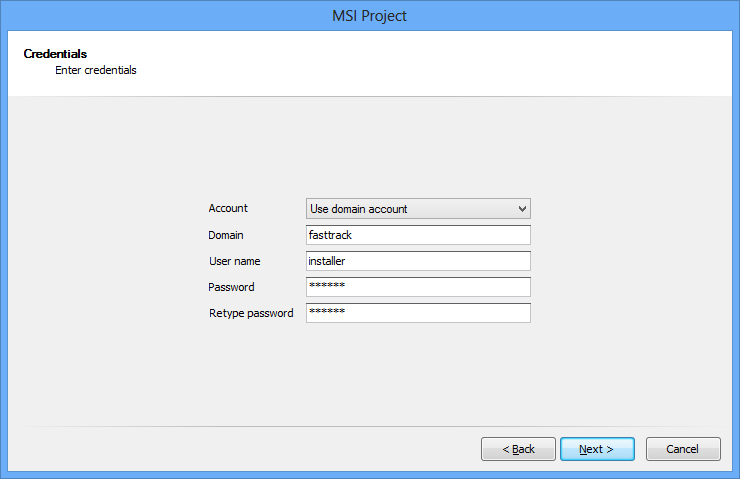
on the second page of the wizard to install software during the night for example. Leave the credentials page by its defaults, as credentials
are built into the script.

Compiling a script into a scheduled task inside an msi package is explained in more detail on
the msi page.
Note that each server will not require FastTrack Scripting Host (the run-time) to be installed,
as the MSI package contains the run-time to execute the scripts.
Once the script is compiled into an MSI file, simply assign a software installation
through a group policy to all your servers, as explained on
the msi page.
Step 1: An alternative version
In the above example, the scheduled task is running under the system account and a network drive was mapped to
include the controller script and get access to installation files. It is also possible to install the
scheduled task as a domain admin and then simply use an UNC path:

The bootstrapper script could then simply include the script, as the script is already running under a
domain admin account:
Include \\AcmeServer\citrixadm$\Installers\Controller.fsh
Step 2: Installing the software
We now know that each server will call our "Controller.fsh" script once a day. To avoid relying on each
servers installed programs list, we will use the RegisterInstallation command to register installations
as described on the
installations page.
The reason we are not using the Windows installation list listed in the control panel, is because it is hard
to get exact and unambiguous information. Often the installation name contains a version number, a language
flavor or similar, which means that the application name is not unique across future versions.
Instead we keep our own list of applications, where we decided names and versions ourselves, by using RegisterInstallation and
supporting conditions. The "Controller.fsh" script looks as shown below. You can insert the script directly
in the script editor by selecting "Farm App Deployment" in the "New Script" window.
/* SANITY
CHECK */
If Not Server Then
Exit
/* LOG START
*/
LogEvent Controller,Central
controller script started
/* INSTALL
PACKAGES - ADD MORE HERE */
InstallMSIPackage AcmeApp1.MSI,Acme
App 1,6.0,1
InstallMSIPackage AcmeApp2.MSI,Acme
App 2,1.0,1
InstallExe CustomSetup.Exe,/S,Custom
Program 1,7.0,1
/* UPLOAD
INVENTORY, IF ANY CHANGES */
UploadInventory
/* LOG END
*/
LogEvent Controller,Central
controller script finished
/* CUSTOM
COMMAND TO INSTALL AN MSI PACKAGE */
Command InstallMSIPackage(MSIPath, Name,
Version, Build)
If Not InstalledBuild [Param Name],[Param build] Then
Run MSIExec.exe,/I [Param MSIPath] /QN /NoRestart
If [LastExitCode]=0 Or [LastExitCode]=3010 Then
RegisterInstallation [Param Name],[Param Version],[Param Build]
LogEvent Installation,[Param Name] installed.
End If
End If
End Command
/* CUSTOM
COMMAND TO INSTALL A CUSTOM EXE */
Command InstallExe(ExeFile,
ExeParams, Name, Version, Build)
If Not InstalledBuild [Param Name],[Param build] Then
Run [Param ExeFile],[Param ExeParams]
If [LastExitCode]=0 Then
RegisterInstallation [Param Name],[Param Version],[Param Build]
LogEvent Installation,[Param Name] installed.
End If
End If
End Command
The script logs events to the local event viewer to make sure that we can trace what is actually
going on in case of problems. In the example two MSI-based applications "Acme App 1" and "Acme App 2" are installed,
if they are not already installed on each server and a non-MSI based application named "Custom Program 1"
is also installed.
It is safe to call the script every day, as the "InstalledBuild" conditions will prohibit the installations
from running more than once per server. As more applications must be installed, we can now just insert one new script line
for each new package and it gets installed on each server at next triggering of the scheduled task.
Now that we are sure that we get a script executed on each server every day, we might as
well do other things also. The script therefore uploads inventory to
SkyBox, but it would
also be easy to do a disk space check and send an email, if a server is low on
disk space. The script could also be used to run SQL Server or other backups.
Test and verification
When later adding new applications or updating existing ones, we need to be able to test and verify the script changes.
As the trigger task now exists on all servers, any one server can be used to test. Simply open the Task Scheduler on the selected
test server, identify the trigger task and run it manually. Then run a number of iterations with script alteration and manual
task start until the script works satisfactory.
The next morning we need to verify that
all servers now have all the applications that are expected. As we are using SkyBox, we don't need
to log onto each server and look at the Windows installed programs list to verify. We can log on to our cloud web account
instead and look at the software list. The number of servers in the list that have each new or changed application
should match the number of servers that has the trigger task, and if not, the software list will reveal the missing server(s).