High-level concept
At a high-level, what you need to do is to set up software deployment with FastTrack. This is not intended for OS deployment, but for general
purpose software distribution. Please review
this page for instruction on how to set it up.
The trick here is to include the current configuration (which includes a list of conditional drivers and applications) in
the OS setup process. This ensures that the deployed client is exactly the same as all other computers at any given time.
The advantages of this approach are:
- We only need a bare-metal install without additional drivers or applications.
- Minimum number of images needed with either WDS, MDT or a cloning tool (only one image in fact).
- Consistency between drivers and applications deployed as part of the OS deploy and existing machines.
- Higher granularity in conditions for installation of drivers and applications (manufacturer, model, geographical location, computer OU, etc).
- You can control computer naming logic (see advanced example at the bottom)
- You can avoid having a plain-text domain admin password in your deployment files (see advanced example at the bottom)
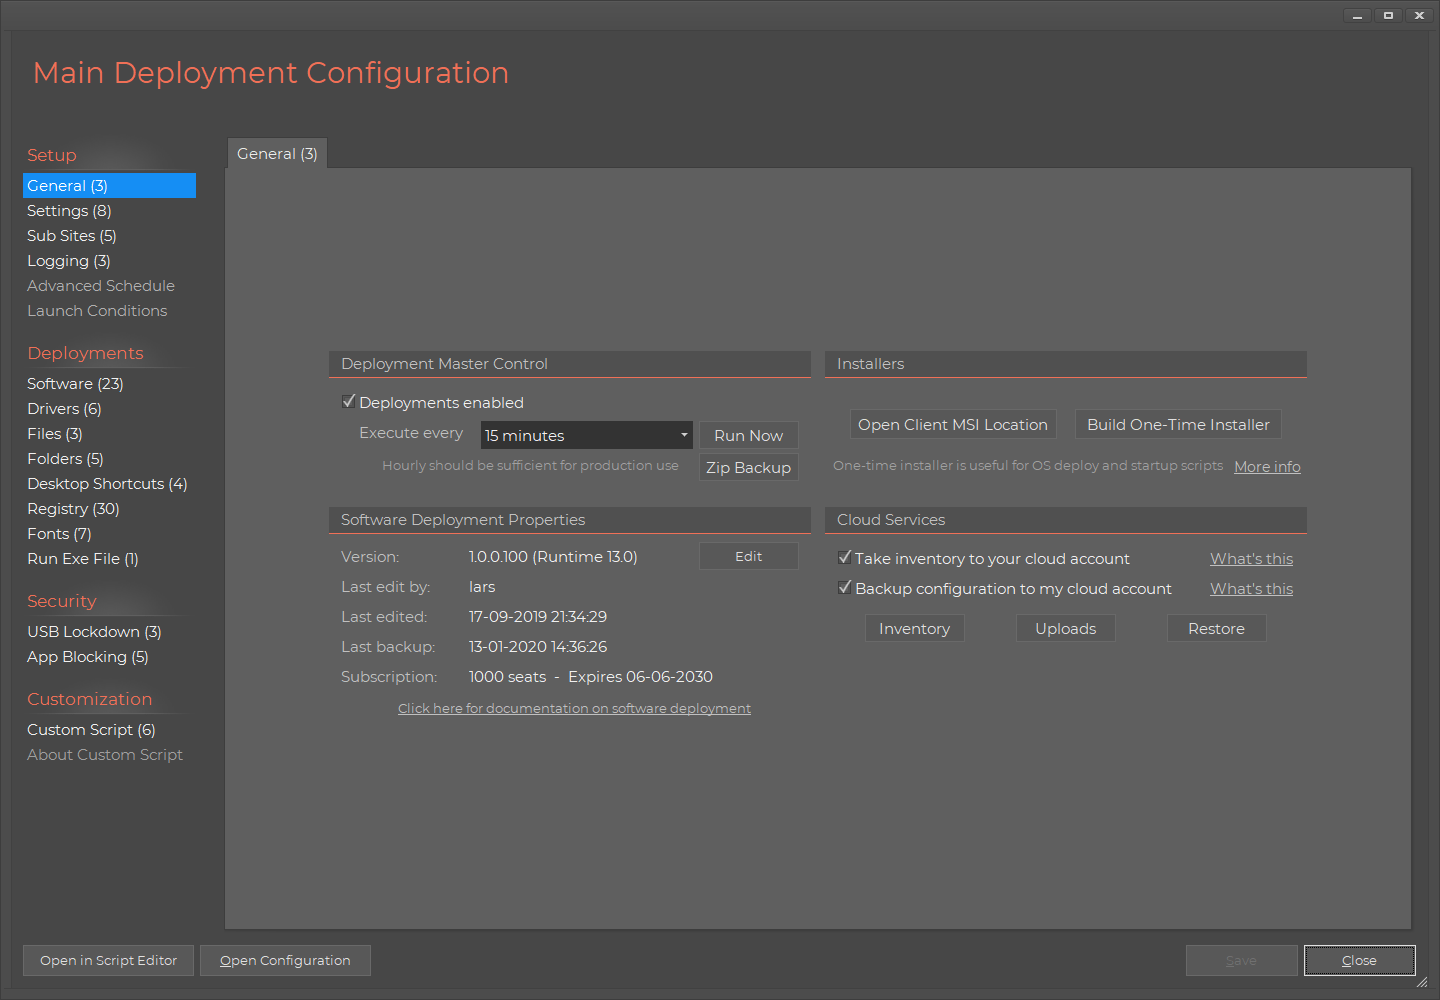
In the simplest form, all you need to do is to set up software deployment, include install of the client MSI file (for future updates) and build
a one-time installer and execute in the setup process and you're set. This way the client MSI will ensure that future changes hit the machine
and the one-time install will ensure that everything is installed, before the user gets the machine. You could opt to not even use the one-time
installer and let the client MSI handle everything after the user gets the computer to save install time, but this would not be a good service
to the end user. Below are screenshots of the main page and drivers page of software deploy.
The details of how to install the MSI and run the EXE is up to you.
The rest of this page will layout one possible way of doing this automatically as part of WDS deployment and also an advanced
example of embedding advanced scripting into the process to control naming of computers and other customizations.
If you have questions or problems setting it up, please contact support at the top menu and we will help you.
WDS version step 1 of 2: Hooking into the deployment process
In this section, we will deploy Windows 7 using WDS (formerly RIS, Remote Installation Services).
This section is also valid for other means of distribution, such as using SCCM or sysprep'ed cloning technology. We will simply be using the $OEM$
folder of a Windows install image to for our custom files at the very end of the installation process. This is officially documented
here on TechNet.
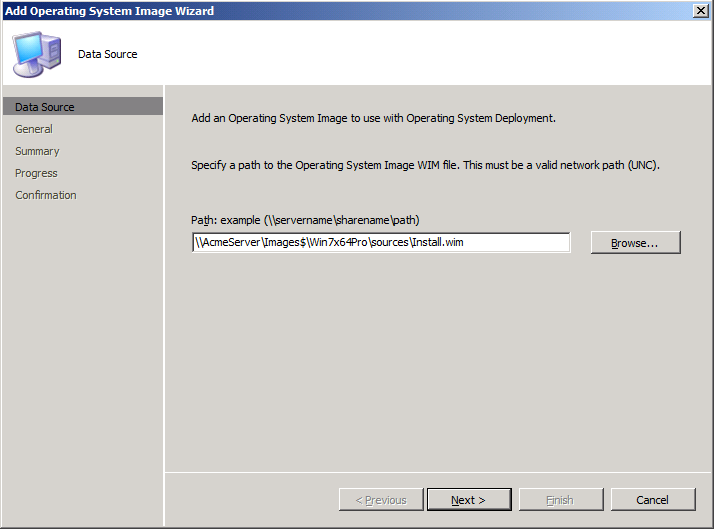
What we need it basically just to get the 4 files (see further down) into the %WinDir%\Setup\Scripts folder during the installation process, which is done by
simply placing the 4 files in the source image under Sources\$OEM$\$$\Setup\Scripts. For example, if you are using SCCM, we would place the 4 files under
\\AcmeServer\Images$\Win7x64Pro\sources\$OEM$\$$\Setup\Scripts, if the operating system image is located in \\AcmeServer\Images$\Win7x64Pro:
In this example we will use Windows Deployment Services (WDS) to push the image out. If you are unfamiliar with
WDS or unattended Windows 7 deployments, please refer to the
documentation from Microsoft on WDS
or the
Windows 7 Step-by-Step Deployment guide.
We need to get a FastTrack Script executed as part of the installation process. To do this, we will use the
Windows feature that looks for a file called SetupComplete.cmd before the final reboot, as explained
here.
For this we need 4 files. To get them to the client before the installation is complete,
we will use WDS' OEM structure to avoid having to modify any image files. If you have already setup
unattended Windows 7 installations through WDS, you can simply follow this procedure to get a script executed without
modifying your existing images.
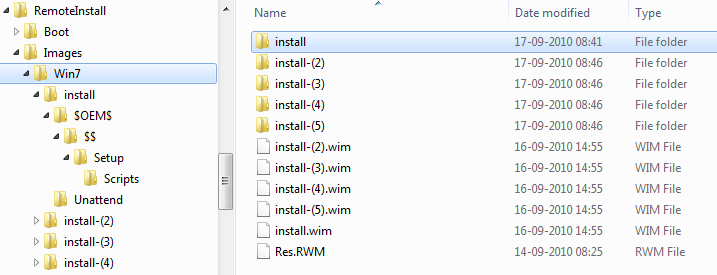
Locate your "Images" folder under your WDS remote install folder. We will create a file structure for one of the images
and then copy the same files to the other image directories. Create a structure for any one of your image files named:
ImageFileNameWithoutExtension\$OEM$\$$\Setup\Scripts:
Under the "Scripts" folder, place these 4 files:
- A copy of FSH.Exe (copy it from C:\Program Files (x86)\FastTrack Software\FastTrack Scripting Host)
- A copy of FSH.Lic (copy it from C:\Program Files (x86)\FastTrack Software\FastTrack Scripting Host)
- A batch file named SetupComplete.cmd (see content below - note that the file must be named SetupComplete.cmd and NOT SetupComplete.bat)
- A script file named Preinstall.fsh (see example content in next section)
Any content under $OEM$\$$ will be copied by WDS to your clients' Windows directory during the installation
process. As Windows setup looks for a file called SetupComplete.cmd, we will need to use that to get our
script named Preinstall.fsh to execute. Thus the content of the file will be this:
%WINDIR%\Setup\Scripts\FSH.Exe %WINDIR%\Setup\Scripts\Preinstall.FSH
Your final structure will look like this:
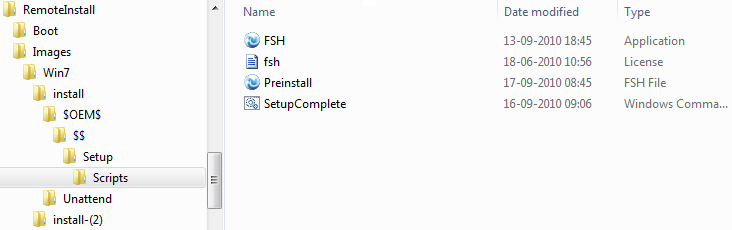
Copy the directory structure to each of your installation images, each time replacing "ImageFileNameWithoutExtension" in the structure
ImageFileNameWithoutExtension\$OEM$\$$\Setup\Scripts by the name of the image file without extension.
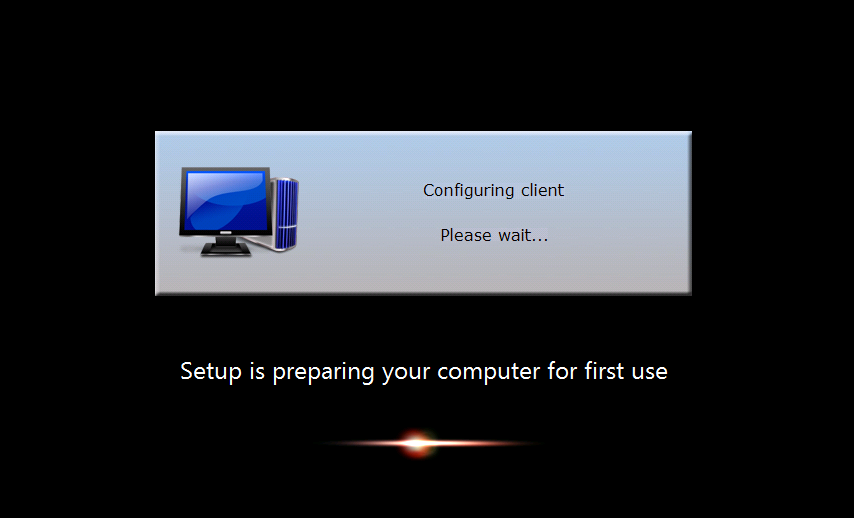
At the end of the installation, the Preinstall.fsh script will execute before the final reboot. In our example script, we show a splash
screen inside the script and the final step of the Windows 7 installation will look like this:
WDS version step 2 of 2: Intelligent driver and software installation
Driver and Application consistency
As shown in the previous section, we need to execute a FastTrack script after base OS install to install drivers and applications.
There are basically two ways to deploy drivers and applications: We can put all driver and software files in subfolders and write a script (option 3 below).
Or we can use the
software deployment feature that was explained under the "High-level Concept" at the top.
The only real benefit of the script approach is to contain all files within the process, in case some of the drivers are required to get network connectivity.
In such case, a hybrid of the two could also be used, where option 3 is used to install basic network drivers and then let software deploy handle the rest.
At the top, we talked about consistency. This the main reason why the first option is best, is because we use
the same drivers and software library
for OS installation and general updates on clients. It's simply the same script that is used after OS installation that is also used for recurring updates
on clients. This means that if you add or replace a driver in software deployment, it will both be updated on running machines AND be used in fresh OS installs,
ensuring complete consistency on all machines.
Option 1 - install Software Deployment client and defer installs (quickest finish time)
The first two options take the approach of using the FastTrack Software Deployment wizard. Please review
this page
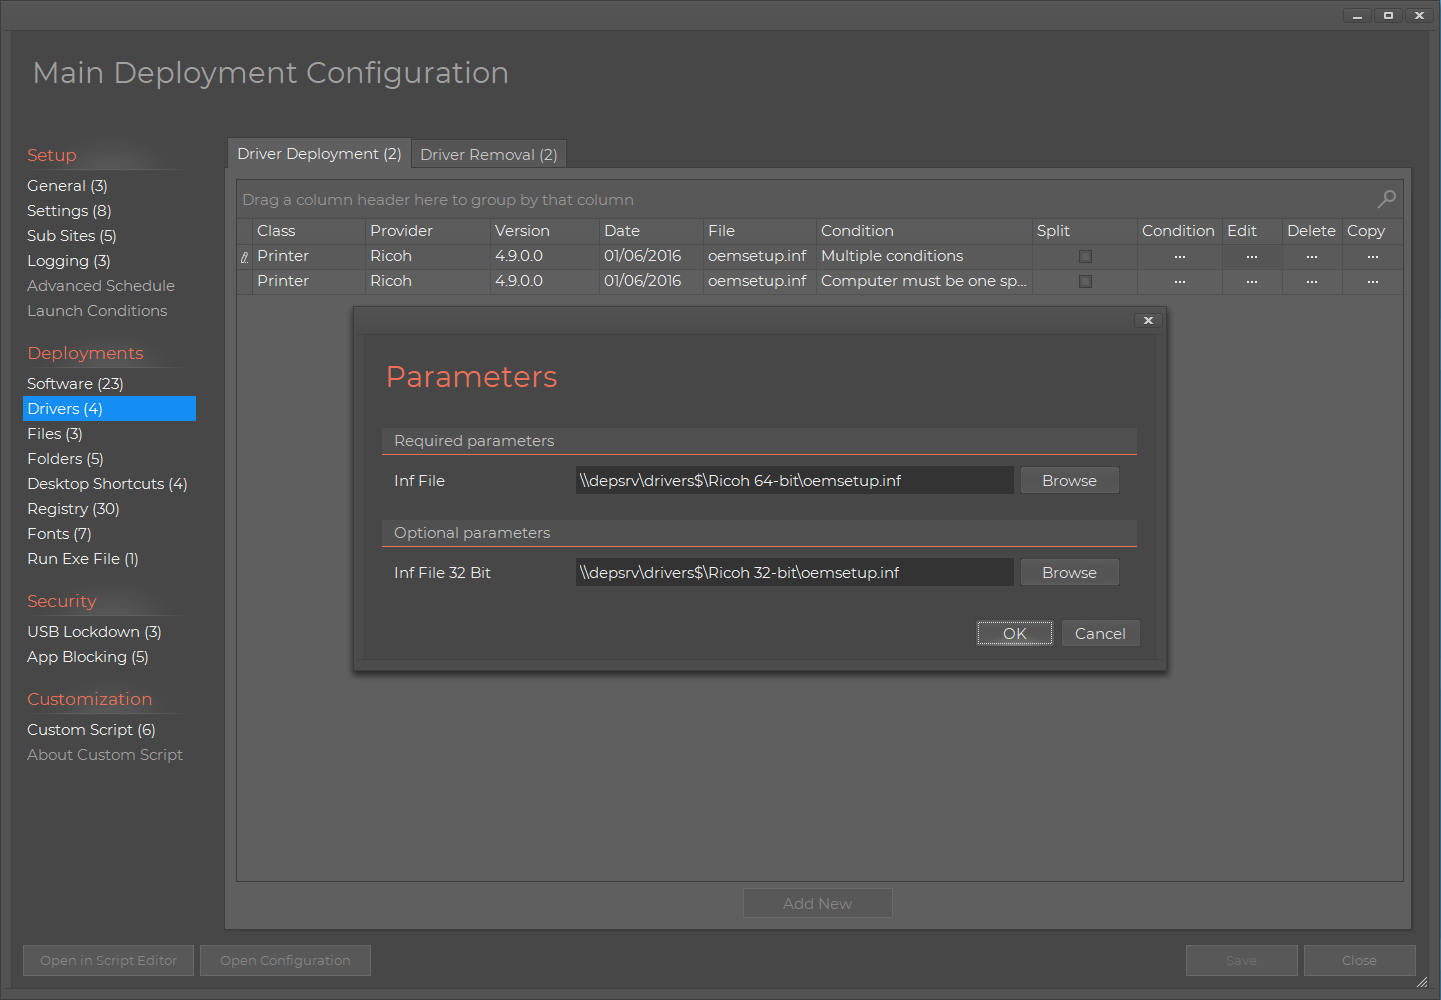
carefully to fully understand the concept. Basically, what you do is that you build an MSI file that must be installed on clients, which is in charge of installing
drivers and software. You then simply use point'n'click to configure drivers and software without writing any code. This is what the driver part looks like:
The Software Deploy part must be set up first.
If you deploy the client through group policies, you do not have do anything further,
because the client (ftclient.msi) will automatically get deployed, once the machine restarts.
If you do not deploy the client through group policy, you can manually install it using the prelogon.fsh script.
Copy the ftclient.msi file to the $oem$ folder (same folder as preinstall.fsh) and now we simply need to install
this MSI file in our preinstall.fsh script and nothing else. All that happens is that we install the FastTrack software deployment client and we are done.
When the computer is started first time after OS deployment, the client will start to install drivers and software. This approach has no extra waiting time for the
IT guy, but it's a leap of faith that everything will be in order, once the user boots the computer for the first time and the software deployments kicks in to install
drivers and application.
Option 2 - install Software Deployment client and install once (recommended)
Now, the ideal solution would be to get the software deployment configuration (drivers and software) executed once, to avoid the scripting approach.
We can do this by building a "One-Time Installer" exe file and put it in the $oem$ directory along with the ftclient.msi file.
You build the exe file on the general tab in software deployment:
Let's assume the exe file was saved as OneTimeInstaller.exe and put in the same directory ($oem$) as the preinstall.fsh script file.
To successfully execute the whole configuration of software and drivers, the tricky part is that at this stage, the machine
is not yet joint to the domain and therefore we need to establish credentials before executing the exe file. A complete script
would look like below, where you have to replace the domain admin username and password (instead of the EncryptPassword function, you can encode
a password in the Script Editor by pressing F8). A splash screen is set in first line, so we can see that there is some wait time at this stage, as shown in the
screenshot in the previous section. Observe that we should still include the ftclient.msi file, because although it will have no effect right away
(because the OneTimeInstaller.exe did the job), we would still want the client installed to handle future changes.
Note that if you deploy the client through group policies, you should not include the last InstallMSI line, because the client
will be installed after reboot.
Splash Configuring client,Please wait...
ImpersonateUser acme\installuser,[EncryptPassword
theinstallpassword]
Run OneTimeInstaller.exe
InstallMSI ftclient.msi
Option 3 - nuts'n'bolts - a FastTrack script
You could also opt to put all the driver files and software in the $oem$ folder and write a script. This is reasonably simple, but requires
you to understand the scripting language and write a script in the Script Editor. You can avoid using software deploy this way, but if you still use Software Deployment, you would
still want to install the ftclient.msi as part of this script.
The below is a basic example, but it's a template for all you need.
The first line will install a video driver, if the manufacturer of the hardware is "Lenovo". The second line combines to conditions;
the machine must be an XPS 15 model manufactured by Dell. The third line will install Office 365 on all machines and forth line will install
Adobe Reader. And this script can be expanded with as many lines as needed using these four types of lines.
Splash Configuring client,Please wait...
If ManufacturerIs
Lenovo
Then
InstallDriver Lenovo\Video\Oemsetup.inf
If ManufacturerIs
Dell
And
ModelIs Dell XPS 15 Then InstallDriver
Dell\Video\Oemsetup.inf
InstallProgram Microsoft Office
365 Pro,16.0.7571.1326,Software\office\setup.exe,/configure configuration.xml
InstallMSI Software\Adobe\Reader.MSI
Advanced scripting - example script to rename computer (and more)
The rest of the page is not necessary to read - unless you have advanced needs for customization
The example script in this section does an array or customizations to demonstrate the power of using the scripting language
for advanced customization. You can pick snippets of it to for example control computer naming. You would want to merge this
script with the above driver and software deployment script.
Stripped of comments, the example script presented further down is only 30 script lines and will basically do the following:
- Gives you control over client naming. The example script will use sequential names and formatting to your preference
- Automatically re-use computer names by looking at the mac address when re-installing clients
- Join the domain without having plain text passwords in answers files or opening up unsecure domain joins
- Optionally put clients in a different organizational unit to avoid the manual step of prestaging computers
- Create an extra local admin account for offline servicing, to protect the built in administrator password
- Put an Active Directory group into the local administrators group, in the example a group called Help DeskUsers
- Install additional files and settings from a single repository, to avoid having a copy for every install image
- Create a local folder for local sharing and give all users full control over the folder
In this example script, we will take over the process of joining the domain and your Windows answer
files must be stripped of domain join information. The password used in the example script to join the
domain is encrypted, which removes the need for an easy-to-retrieve plain text admin password in Windows answer files,
opening up unsecure domain joins or using manual prestaging.
Example script (Preinstall.fsh)
In the previous section we talked about how to get a script to execute before the final reboot and
in this section, we will present an example script. The script is directly available in the script editor: Go to the "Documentation" tab,
select "Windows 7 Deployment Script" under the "Insert Example Script" submenu.
The script is explained in detail in the next section.
To construct and test a script of this type, it is not necessary to run a full Windows installation for every test
iteration.
Just execute it on a computer that is not in the domain. To test again, unjoin the domain and repeat this procedure
until the script is finalized.
The script is an example, any undesired functionality can be removed and your own additional custom scripting can be inserted.
The first 7 script lines in the example must be modified with your custom information:
- Credentials for the executing domain admin user
- UNC path to a share that contains client files (the script will create two files in the root first time executed)
- Credentials of the additional local administrator account created
- The name of an Active Directory group that will be put into the local administrators group
Both passwords must be encrypted in the script editor by selecting "Encrypt Password" in the "Tools" menu. For further details,
look at the next section for the details in the example script.
Do NOT run the script on your own computer. Unless the script fails to connect the share, it will rename the executing computer.
'' STATICS
Set DomainName = Acme
Set DomainAdminUser = Administrator
Set DomainAdminPassword = lqlfPSO39yhTWQgofzBLWg==
Set DistSharePath = \\AcmeInst\reminst
Set ExtraLocalAdminUser = LocalServiceOperator
Set ExtraLocalAdminPassword = yESegDH6a2UK2GSrUkRBXA==
Set GroupToAddToAdminsGroup = Help DeskUsers
'' SHOW THAT WE ARE NOW IN THE FSH PART: DISPLAY A SPLASH SCREEN
Splash Configuring client,Please wait...
'' FORCE OBTAINING AN IP ADDRESS FROM DHCP. THE NIC(S) MAY NOT HAVE AN
IP ADDRESS AT THIS POINT
RenewIP
'' CONNECT THE DISTRIBUTION SHARE AS W:
ConnectShare W:,[Var DistSharePath],[Var DomainName]\[Var DomainAdminUser],[Var DomainAdminPassword]
'' GET MAC ADDRESS AND REMOVE COLON (COLON CANNOT BE USED AS XML KEY)
Set MacAddress = [Replace [MacAddress],":",""]
'' CHECK IF THIS IS A RE-INSTALLATION. LOOK IN A FILE CALLED CLIENTS.XML
IN THE DISTRIBUTION SHARE ROOT FOR A
'' NODE CALLED <MAC_xxxxxxxxxxxx> UNDER <CLIENTS>, WHERE X'S
IS THE MAC ADDRESS OF THE FASTEST NETWORK ADAPTER
Set ComputerName = [XMLValue W:\Clients.XML,Clients/MAC_[Var MacAddress]]
'' IF THE XML LOOKUP DID NOT RETURN A PREVIOUS COMPUTER NAME, THE
VARIABLE IS EMPTY AND IT'S NOT A RE-INSTALL
If VarIsEmpty ComputerName Then
'' NEW MACHINE: GET THE SEQUENCE COUNTER FROM A FILE IN THE ROOT OF THE
DISTRIBUTION SHARE CALLED CLIENTSEQUENCE.XML.
'' IT CONTAINS
<CURRENTCOUNT>X</CURRENTCOUNT> WHERE X IS THE CURRENT COUNTER. IF
THE FILE DOES NOT EXIST, DEFAULT IS 1
Set Counter = [XMLValue W:\ClientSequence.XML,CurrentCount,1]
'' GENERATE A NEW COMPUTER NAME IN THE FORMAT "ACMExxxx" BY
PADDING THE COUNTER TO 4 DIGITS AND PREFIX WITH "ACME"
Set ComputerName = ACME[PadLeft [Var Counter],0,4]
'' ADD 1 TO THE SEQUENCE COUNTER FOR THE NEXT INSTALLING COMPUTER
IncVar Counter
'' WRITE THE NEW COUNTER TO THE CLIENTSEQUENCE.XML FILE. IF THE FILE
DOES NOT EXIST, IT WILL BE CREATED
WriteXMLValue W:\ClientSequence.XML,CurrentCount,[Var Counter]
'' SAVE MAC AND NEW NAME TO THE CLIENTS.XML FILE FOR FUTURE
RE-INSTALLATIONS. THE FILE IS CREATED, IF IT DOES NOT EXIST
WriteXMLValue W:\Clients.XML,Clients/MAC_[Var MacAddress],[Var ComputerName]
End If
'' RENAME THE COMPUTER NAME AND JOIN THE DOMAIN.
'' USE JoinDomainAndOU COMMAND TO PLACE THE COMPUTER IN A SPECIFIC OU
SetComputerName [Var ComputerName]
JoinDomain [Var DomainName],[Var DomainAdminUser],[Var DomainAdminPassword]
'' THE DOMAIN HAS JUST BEEN JOINED AND THE EXECUTING USER HAS NO ACCESS
TO DOMAIN OBJECTS. TO
'' PUT DOMAIN USERS INTO LOCAL GROUPS AT THIS POINT, WE HAVE TO
IMPERSONATE A DOMAIN USER
ImpersonateUser [Var DomainName]\[Var DomainAdminUser],[Var DomainAdminPassword]
'' ADD A DOMAIN GROUP TO THE LOCAL ADMINISTRATORS GROUP, FOR INSTANCE A
GROUP OF HELP DESK USERS
AddGroupToLocalGroup [Var GroupToAddToAdminsGroup],[LocalAdminsGroup]
'' CREATE A LOCAL WRITABLE FOLDER IN CASE LOCAL USERS NEED TO SHARE DATA
MakeDir C:\AcmeShared
SetDirPermissions C:\AcmeShared,Everyone:Full
Control
'' CREATE A CUSTOM LOCAL ADMINISTRATOR SERVICE ACCOUNT FOR OFFLINE
SERVICING
CreateLocalUser [Var ExtraLocalAdminUser],[Var ExtraLocalAdminPassword]
AddLocalUserToLocalGroup [Var ExtraLocalAdminUser],[LocalAdminsGroup]
'' COPY CUSTOM CLIENT FILES AND DIRECTORY STRUCTURE FROM A FOLDER NAMED
"CLIENTFILES" IN THE ROOT OF THE DISTRIBUTION SHARE
CopyDir W:\ClientFiles,C:\
'' LOG EVENT FOR TRACEABILITY
LogEvent OS Installation,Computer successfully joined domain [Var DomainName] as [Var ComputerName]
'' INSTALL FSH INTO PROGRAM FILES AND ASSOCIATE THE .FSH EXTENSION TO
THE ENGINE
SelfInstall
'' REBOOT, INSTALLATION IS NOW COMPLETE
RebootForced
The script explained
The script will connect a network share called W: with the supplied credentials. This share can be any share on the network and must contain a folder named "ClientFiles",
which contains files that will be copied to all clients. Furthermore, the first time the script is executed, two xml files
will be created in the root, to keep track of client naming and for re-using computer names, when re-installing clients.
There are no special requirements for this share. Just create a folder on a server, share it and place a "ClientFiles" directory in it.
We will refer to this share as the distribution share from here on.
Computer naming
In the root of the distribution share, an xml file will be created the first time the script is executed and
it contains a sequence counter that can be changed at any time. The name Acme, number of decimals,
and other computer name formatting can be edited in the script itself.
If the computer must be placed in a specific organizational unit, simply use the JoinDomainAndOU instead of JoinDomain in the script.
If there are multiple naming formats or multiple OU's to place computers in, you can create multiple copies of your
install images with different Preinstall.fsh files. Alternatively, a menu could be shown,
asking for a list of choices to feed to SetComputerName and JoinDomainAndOU. This would however break the idea of a completely
unattended installation.
If you already have computers and want to start with a higher sequence count, simply create a ClientSequence.XML file
in the root of the distribution share with a default content, as shown below, assuming first computer should be 400 in the sequence.
<CurrentCount>400</CurrentCount>
Re-using computer names
Each time a new computer name is created, the mac address and the computer name is stored in a file called
Clients.XML in the root of the distribution share. The purpose of this file is for the script to detect when a computer is re-installed, to avoid
having obsolete accounts in the domain. After installing the first client, the file would look like this
(with a different MAC address):
<Clients>
<MAC_00155D010136>ACME0001</MAC_00155D010136>
</Clients>
When the script is executed, the script looks in the file for a node called MAC_xxxxxxxxxxxx where the x's is
the mac address of the fastest network adapter in the computer. If a value is returned (Acme0001 in the case
the mac address is 00155D010136), this name is used and a new name is not created.
Putting an additional group into the local administrators group
The intention with this operation is to give a certain group, which is not a member of domain admins,
local administrator permissions. This could typically be Help Desk users that need to service the computer.
The executing user is not a domain user, thus credentials to the domain must be established to
get access to domain objects, in this case an Active Directory group. To establish credentials,
the domain admin user is impersonated with the ImpersonateUser command. The next command, AddGroupToLocalGroup,
will put a group into the local administrators group using the impersonated credentials.
Additional administrator account
An additional administrator account is created. The purpose of this is to avoid having to give the local
administrator password to service operators, in case the computer needs to be serviced offline.
Local writable folder
A folder called C:\AcmeShared is created and any user will get full control over the folder. The purpose
is to let users share files locally that are not needed to be backed up and take up network
storage.
SelfInstall
The SelfInstall command will copy the executing engine (from %WinDir%\Setup\Scripts) and the license file to "FastTrack Software\FastTrack Scripting Host"
under the Program Files directory and associate the .fsh extension to the exe file. This will allow execution of .fsh files on the computer without
specifying where the exe file is located.
If you are using FastTrack Logon for logon scripts: It is important to understand that when using FastTrack Logon,
it will copy its own copy of the engine to the user's profile, execute the login script with this copy and make
a user association to .fsh files to this copy. If the user then executes an .fsh file, it will be this copy that
is executing the script. If the system, a local user or a user that does not use FastTrack login executes a script,
it will be the copy installed under Program Files. This is because a user file association superseds a system file association.
And the reason why this is important to know, is that if at some point in the future a newer version is used for
login scripts, this will not be a problem because FastTrack Logon's copy will supersed a system installed copy of the engine.
Copying of additional files
On the administrative share, any files under a folder named "ClientFiles" will be copied to the same
locations on the client. If there for instance is a folder named Program Files\Acme, this will be placed in the same
structure on the client.
This can also be accomplished by putting these files inside install images, but usually this means there
are multiple copies of the same client files, increasing maintenance time and the chance of inconsistency.
Typically there would be further scripted manipulation related to your additional files, like creating shortcuts
in the default user's profile, setting registry values related to the files, etc. These things can easily be
inserted after the copying.
Also, if you have scripted your installations, these could also be included with simple include commands.
See
unattended installation
for more details on scripted installations.
SkyBox
One last note is relation to unattended installations of Windows.
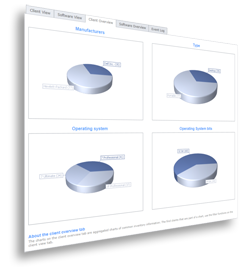
If you don't have a management system, you don't know what is installed on which computers, who has what computer
or what hardware is in which computer.
|
FastTrack comes with a cloud-based inventory system
that has no setup steps and is free for licensed customers.
You can just include this one simple command in your unattended script
to upload inventory information:
With this one command, you will have full hardware and software inventory of your computers.
It is a good idea to include this same command in your regular logon script also, as the upload will
then include information about who logged on to the computer the last time.
SkyBox has no additional cost; it just requires your clients to be licensed and within
maintenance period. Refer to this page for more
information on SkyBox.
|